Enable Digital Experiences
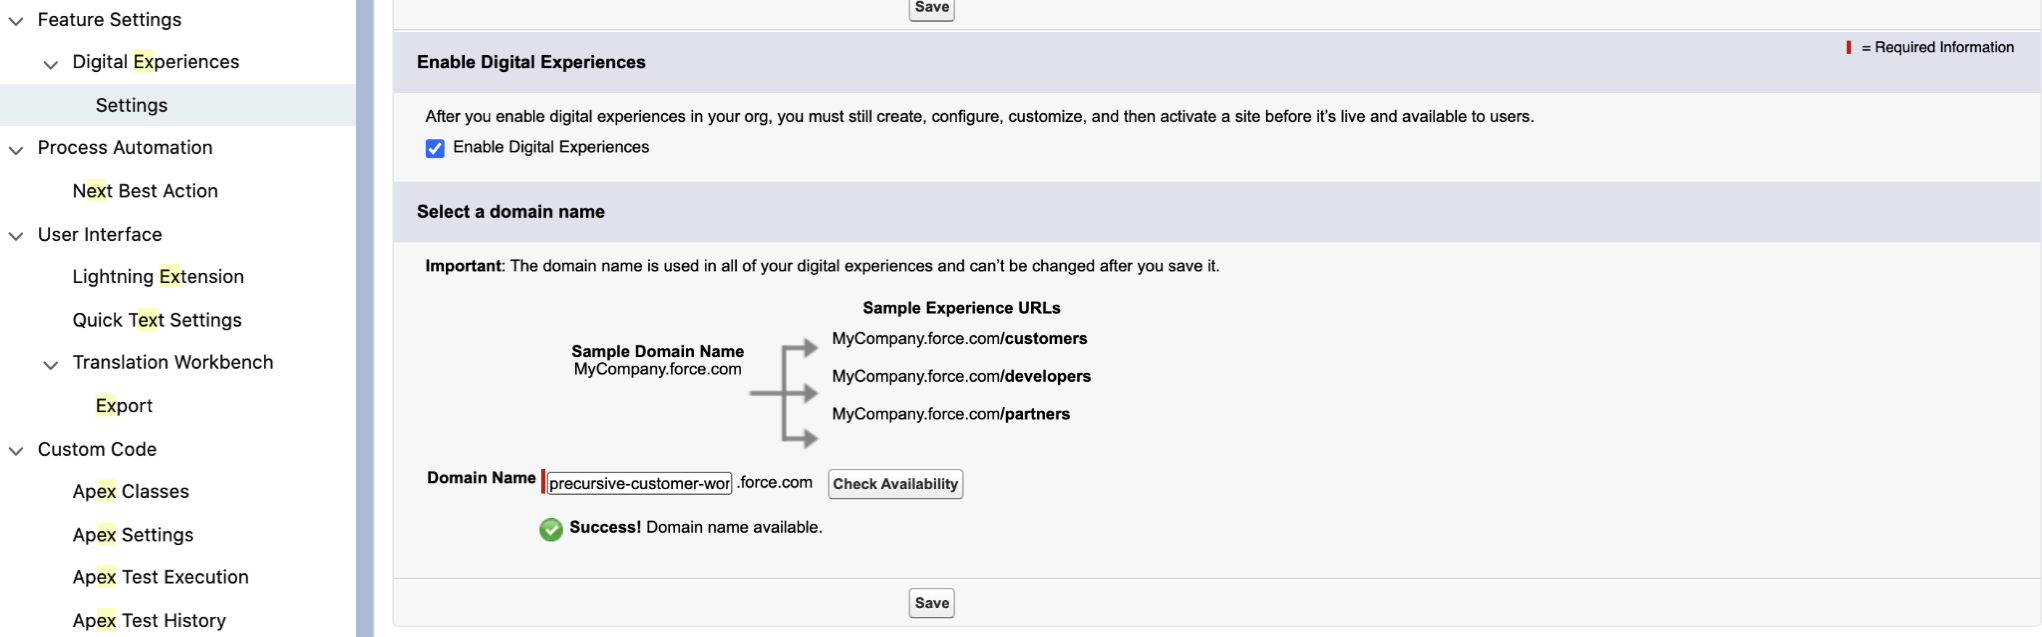
First step that is required is to enable Digital Experiences on your org. To make it please go to Setup >> Feature Settings >> Digital Experiences tick checkbox next to Enable Digital Experiences, provide a Domain Name for your Community and click Save.
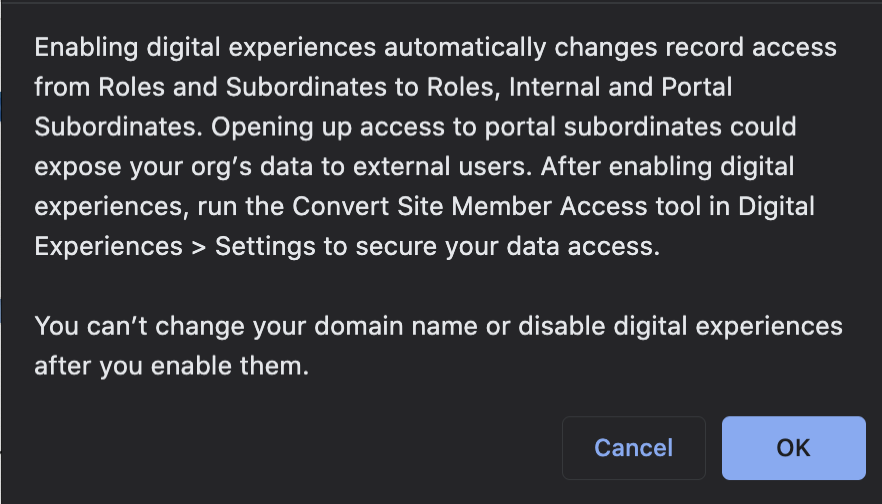
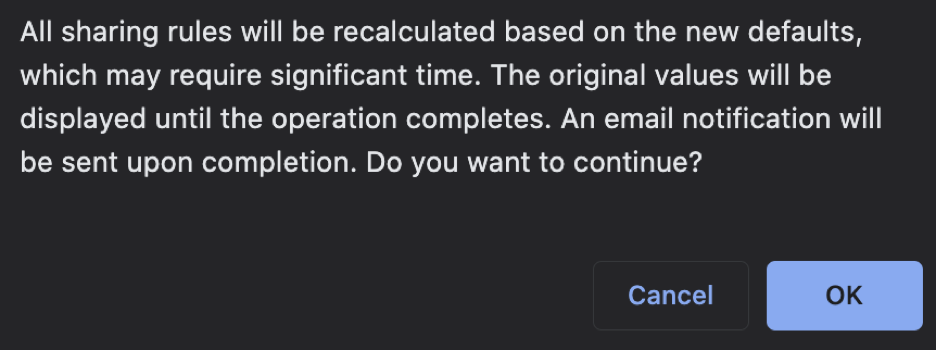
After save button is clicked, there will be pop-out with confirmation that you need to click OK on:
Create Site and pick Precursive Customer Workspace template
Precursive Customer Workspace prerequisites
Customer Workspace template requires Precursive OBX 19.1.2 (or above) installed on your org and Experience Cloud has to be enabled.
To make it possible to invite Contacts to Precursive Customer Workspace, all Account Owners need to have a Role assigned to them.
Create a Site
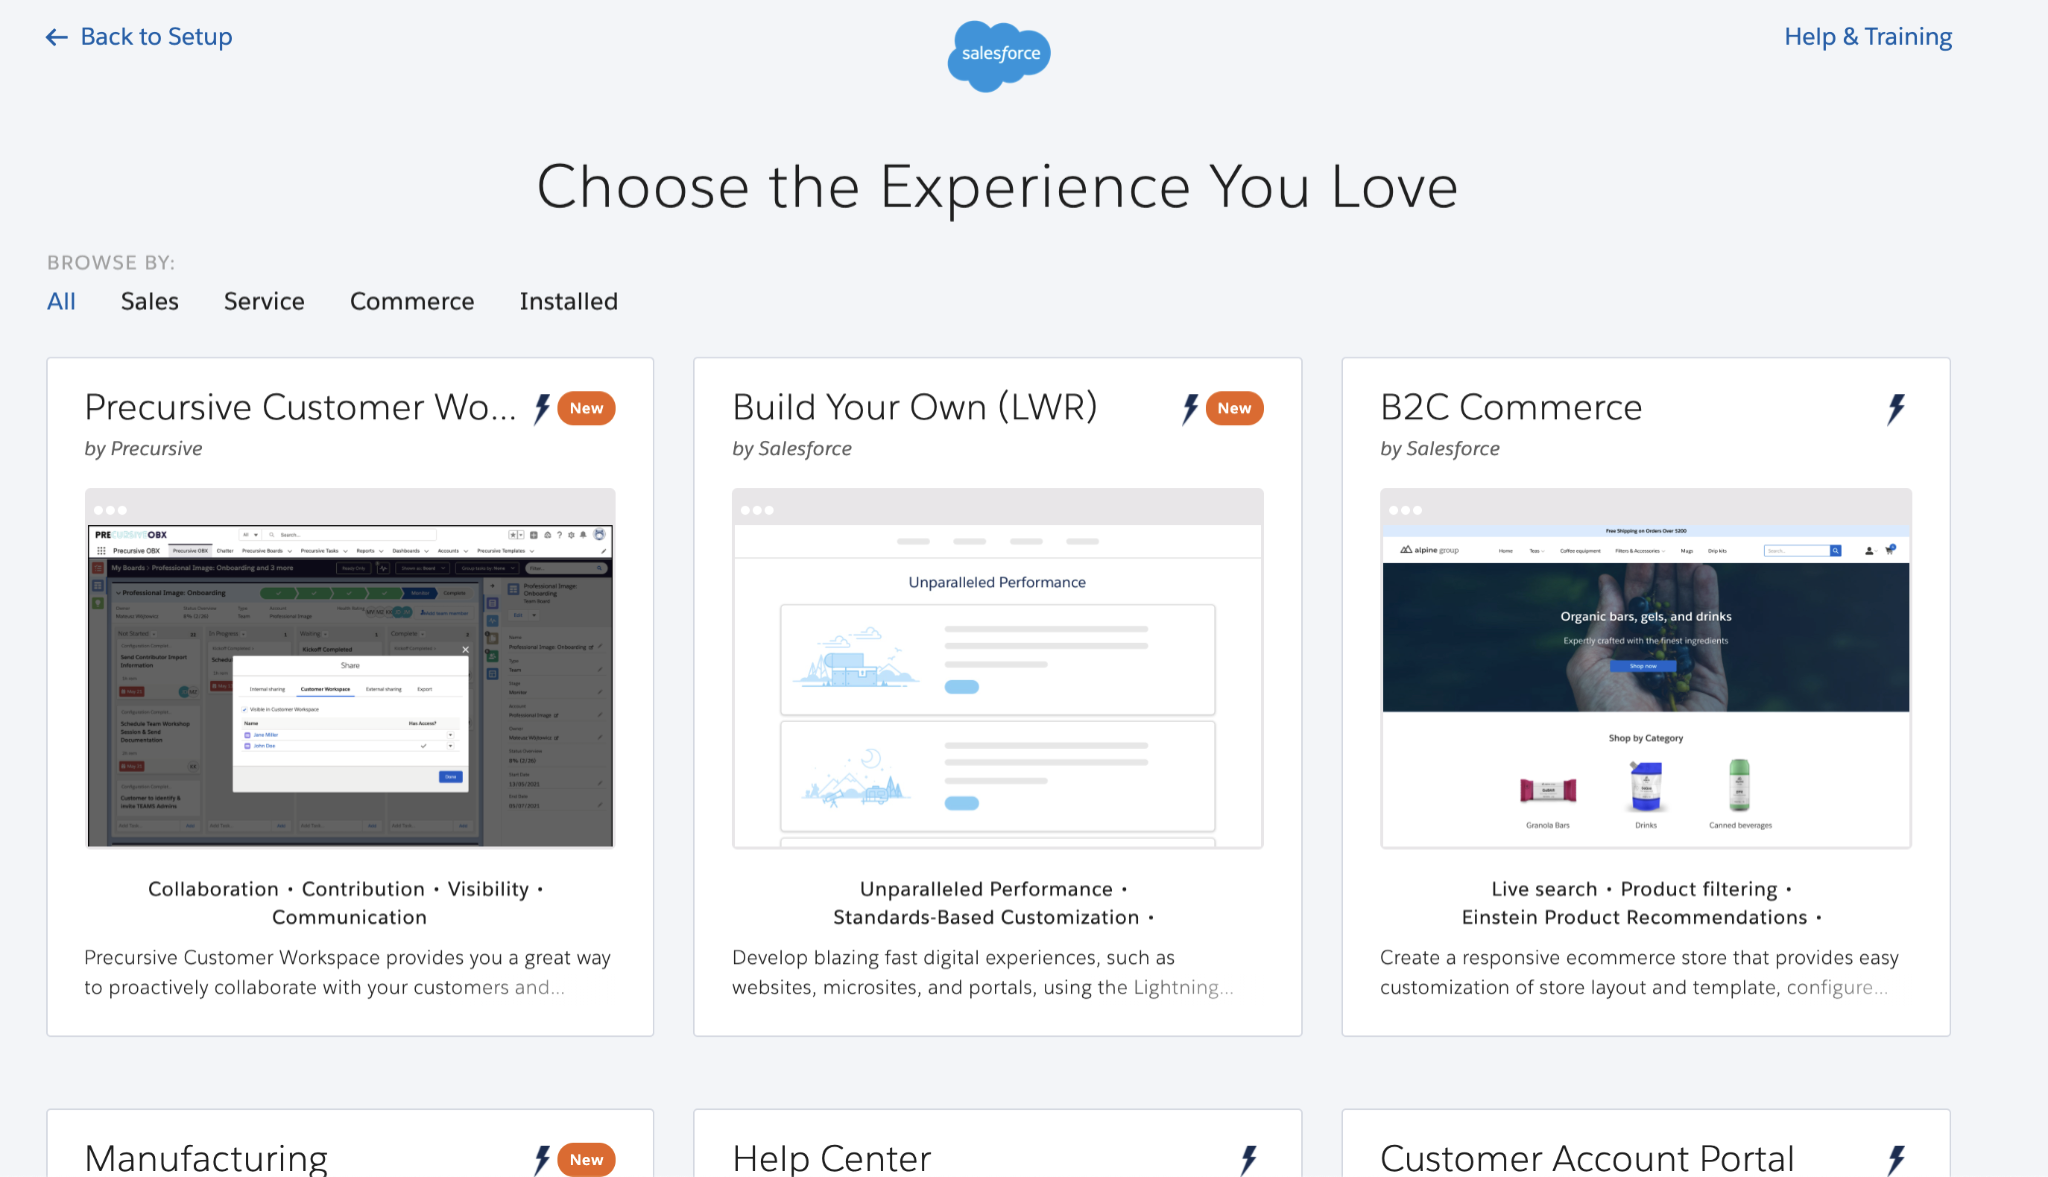
After enabling Experience Cloud, please go to Setup >> Feature Settings >> Digital Experiences >> All Sites and click on New, then you will be redirected to a page, where you can select a Precursive Customer Workspace template.
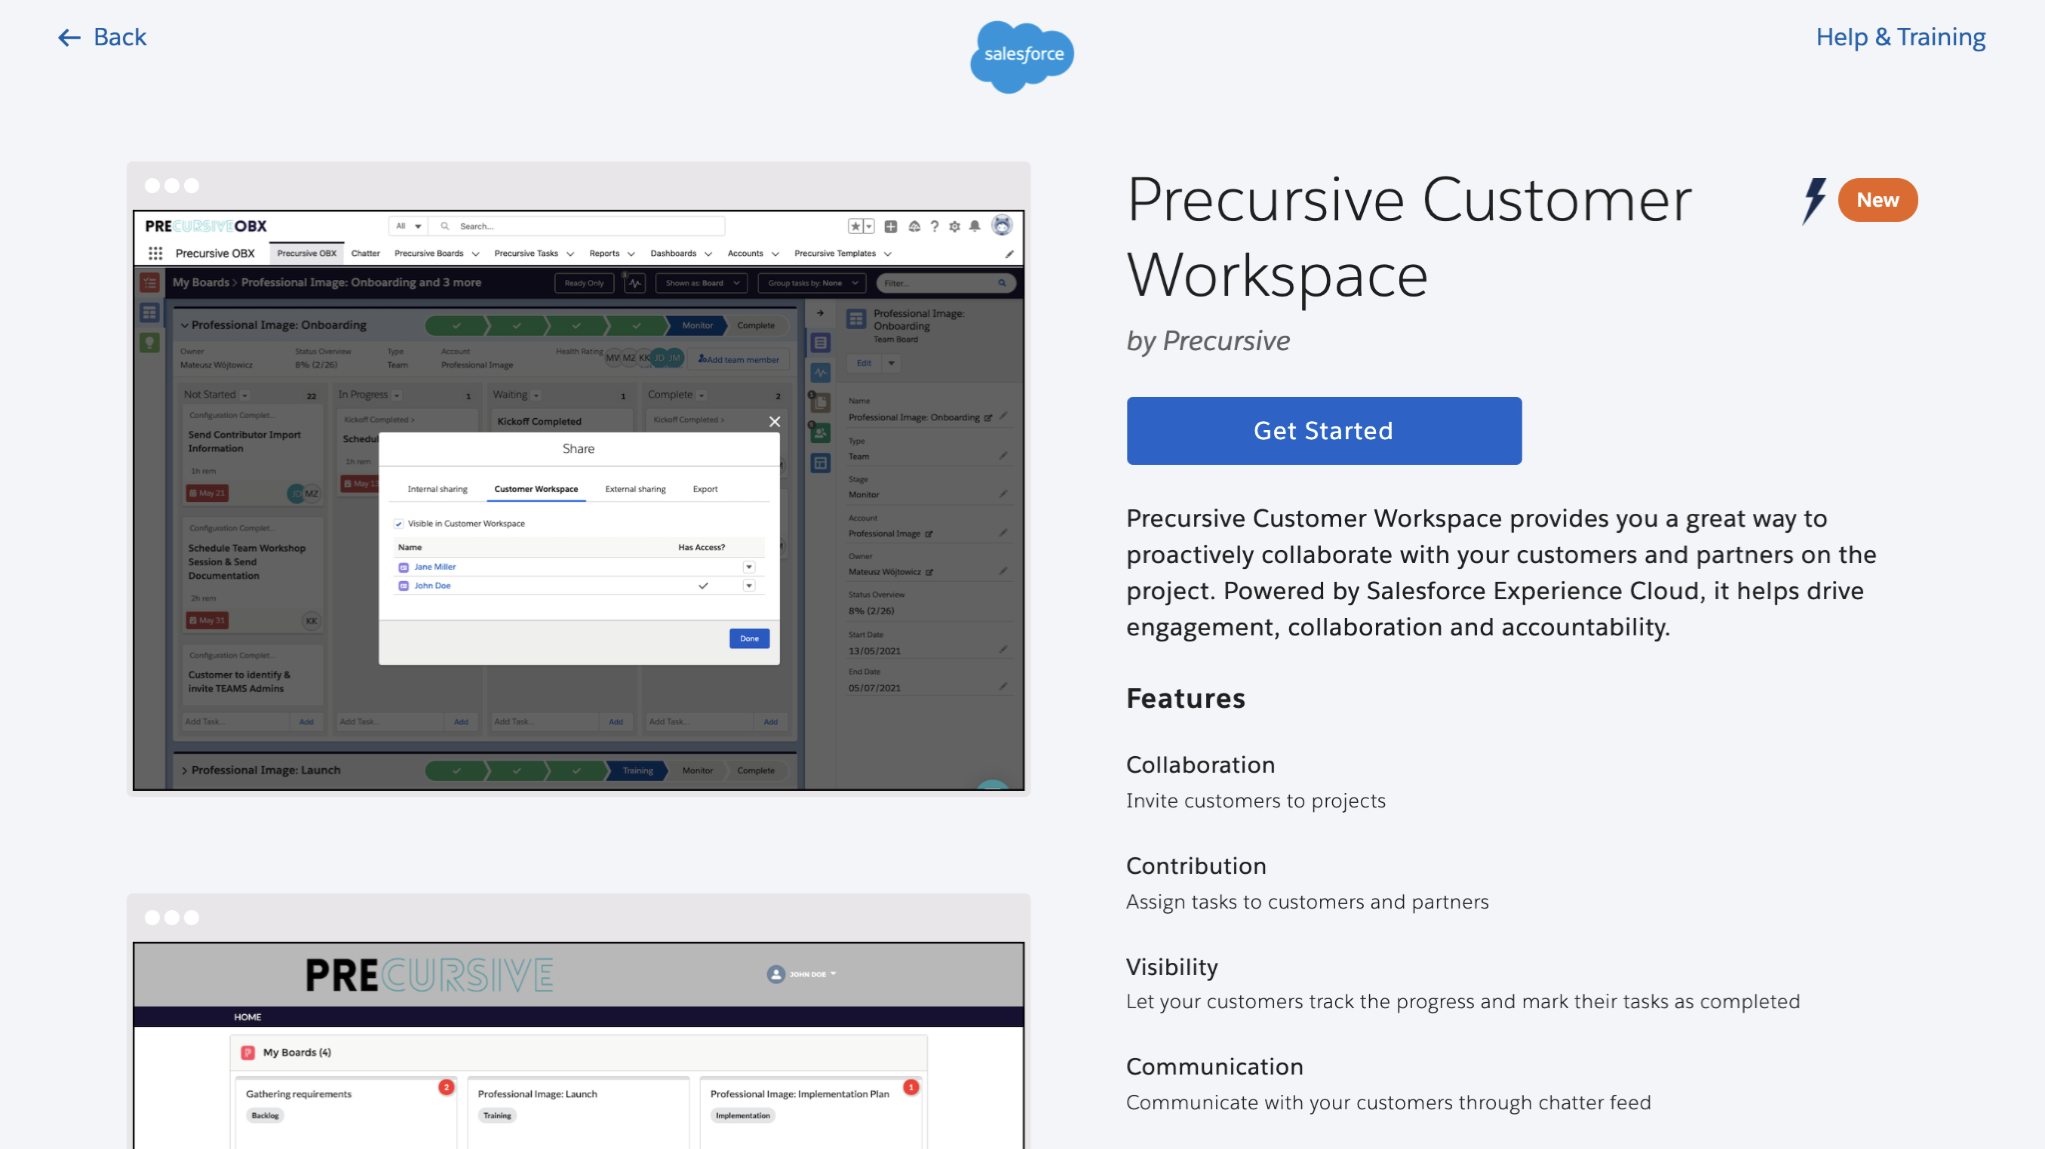
After selecting Precursive Customer Workspace, you will be moved to package’s details page from which you need to click on Get Started button to select this template.
Then, you need to provide a Name and, optionally, add some routing after the URL which depends if you have any other Experience Cloud sites active or your company policy. When everything here is provided, you need to click on the Create button.
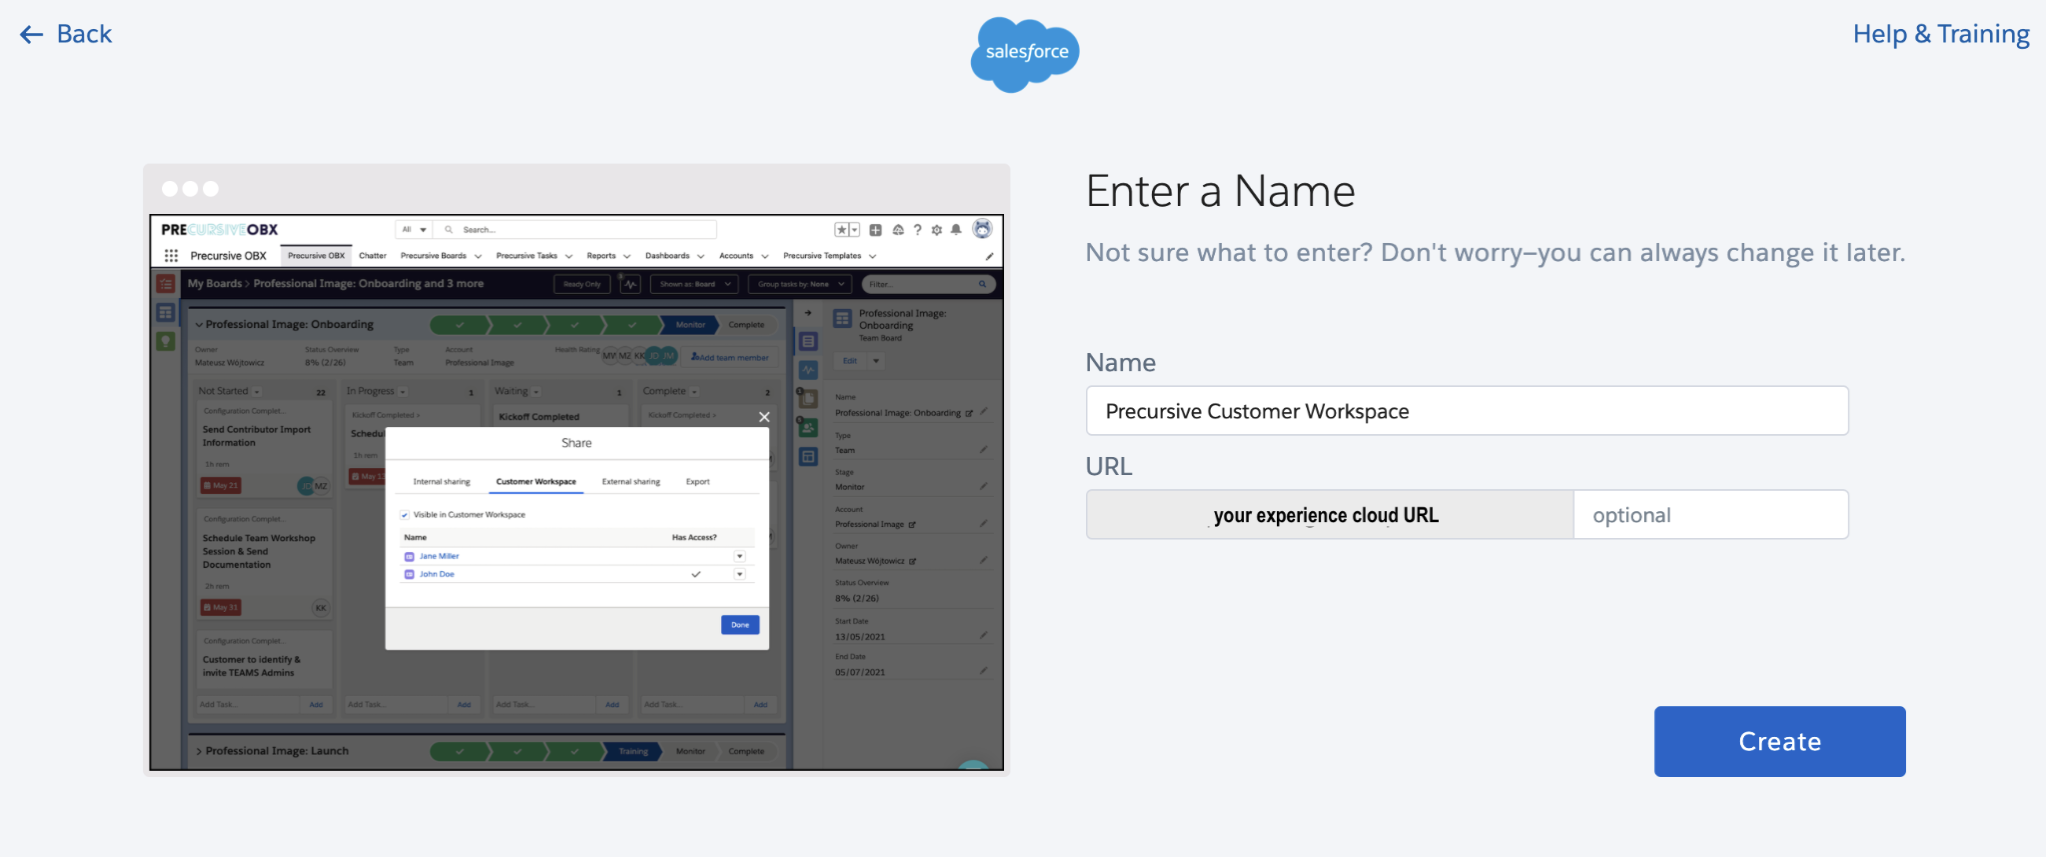
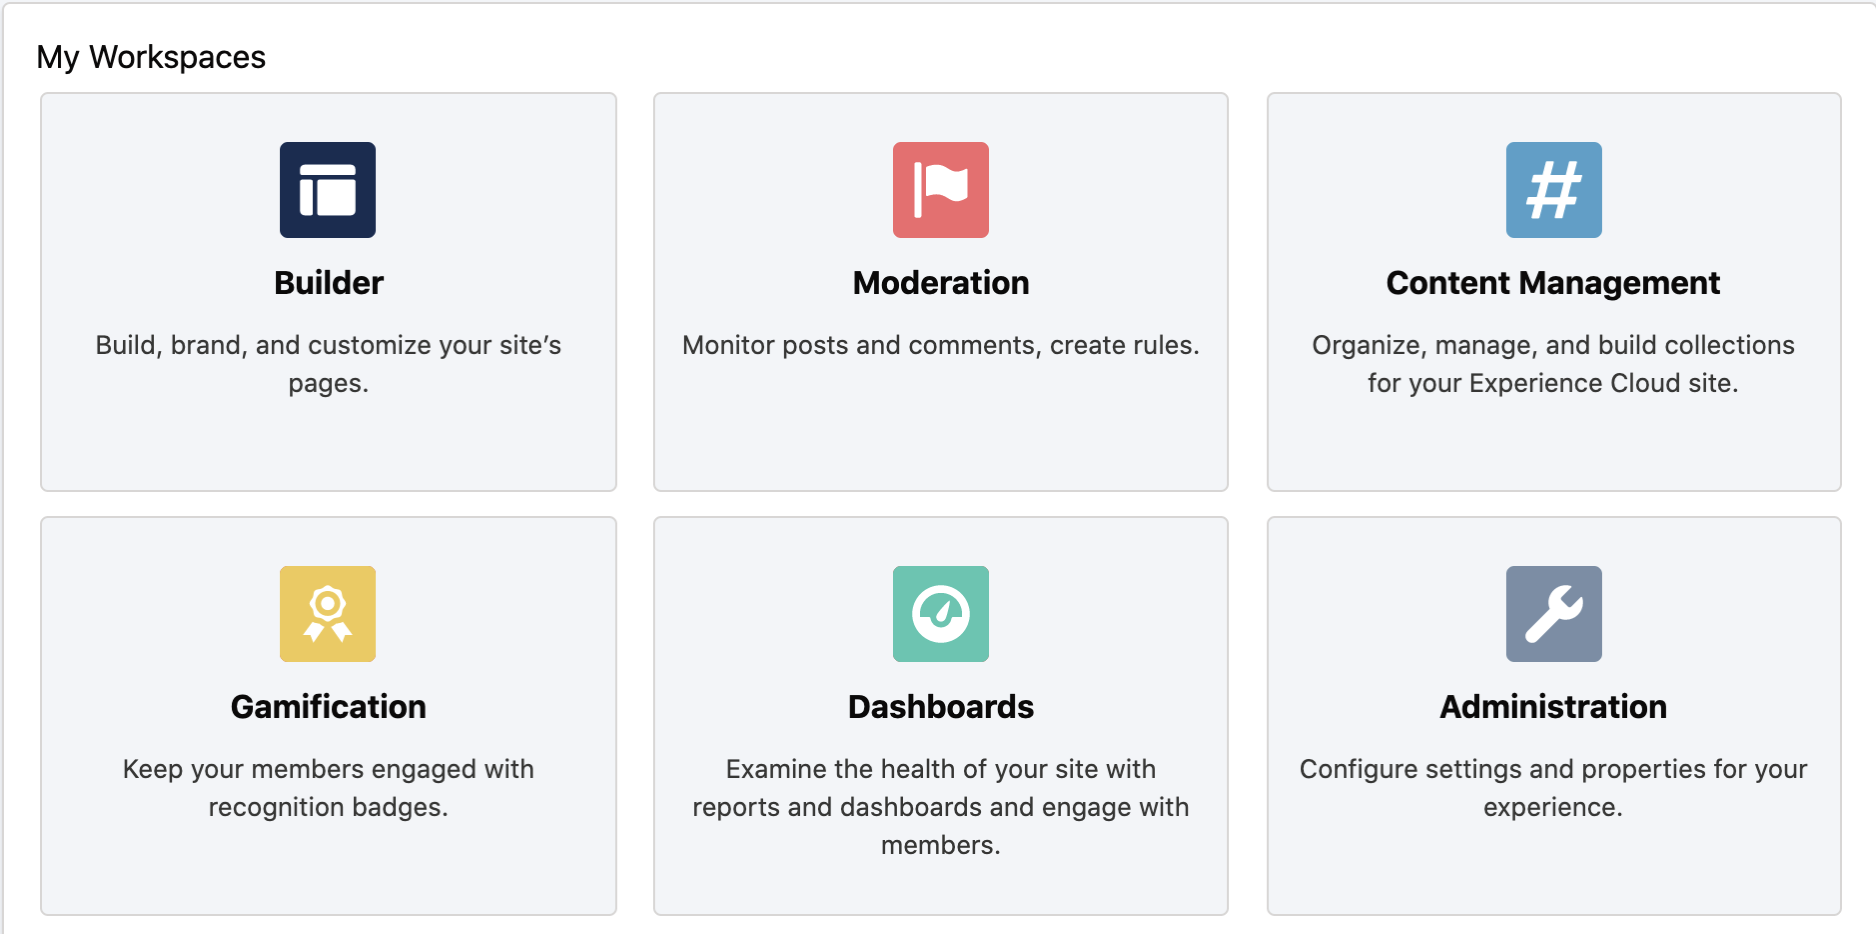
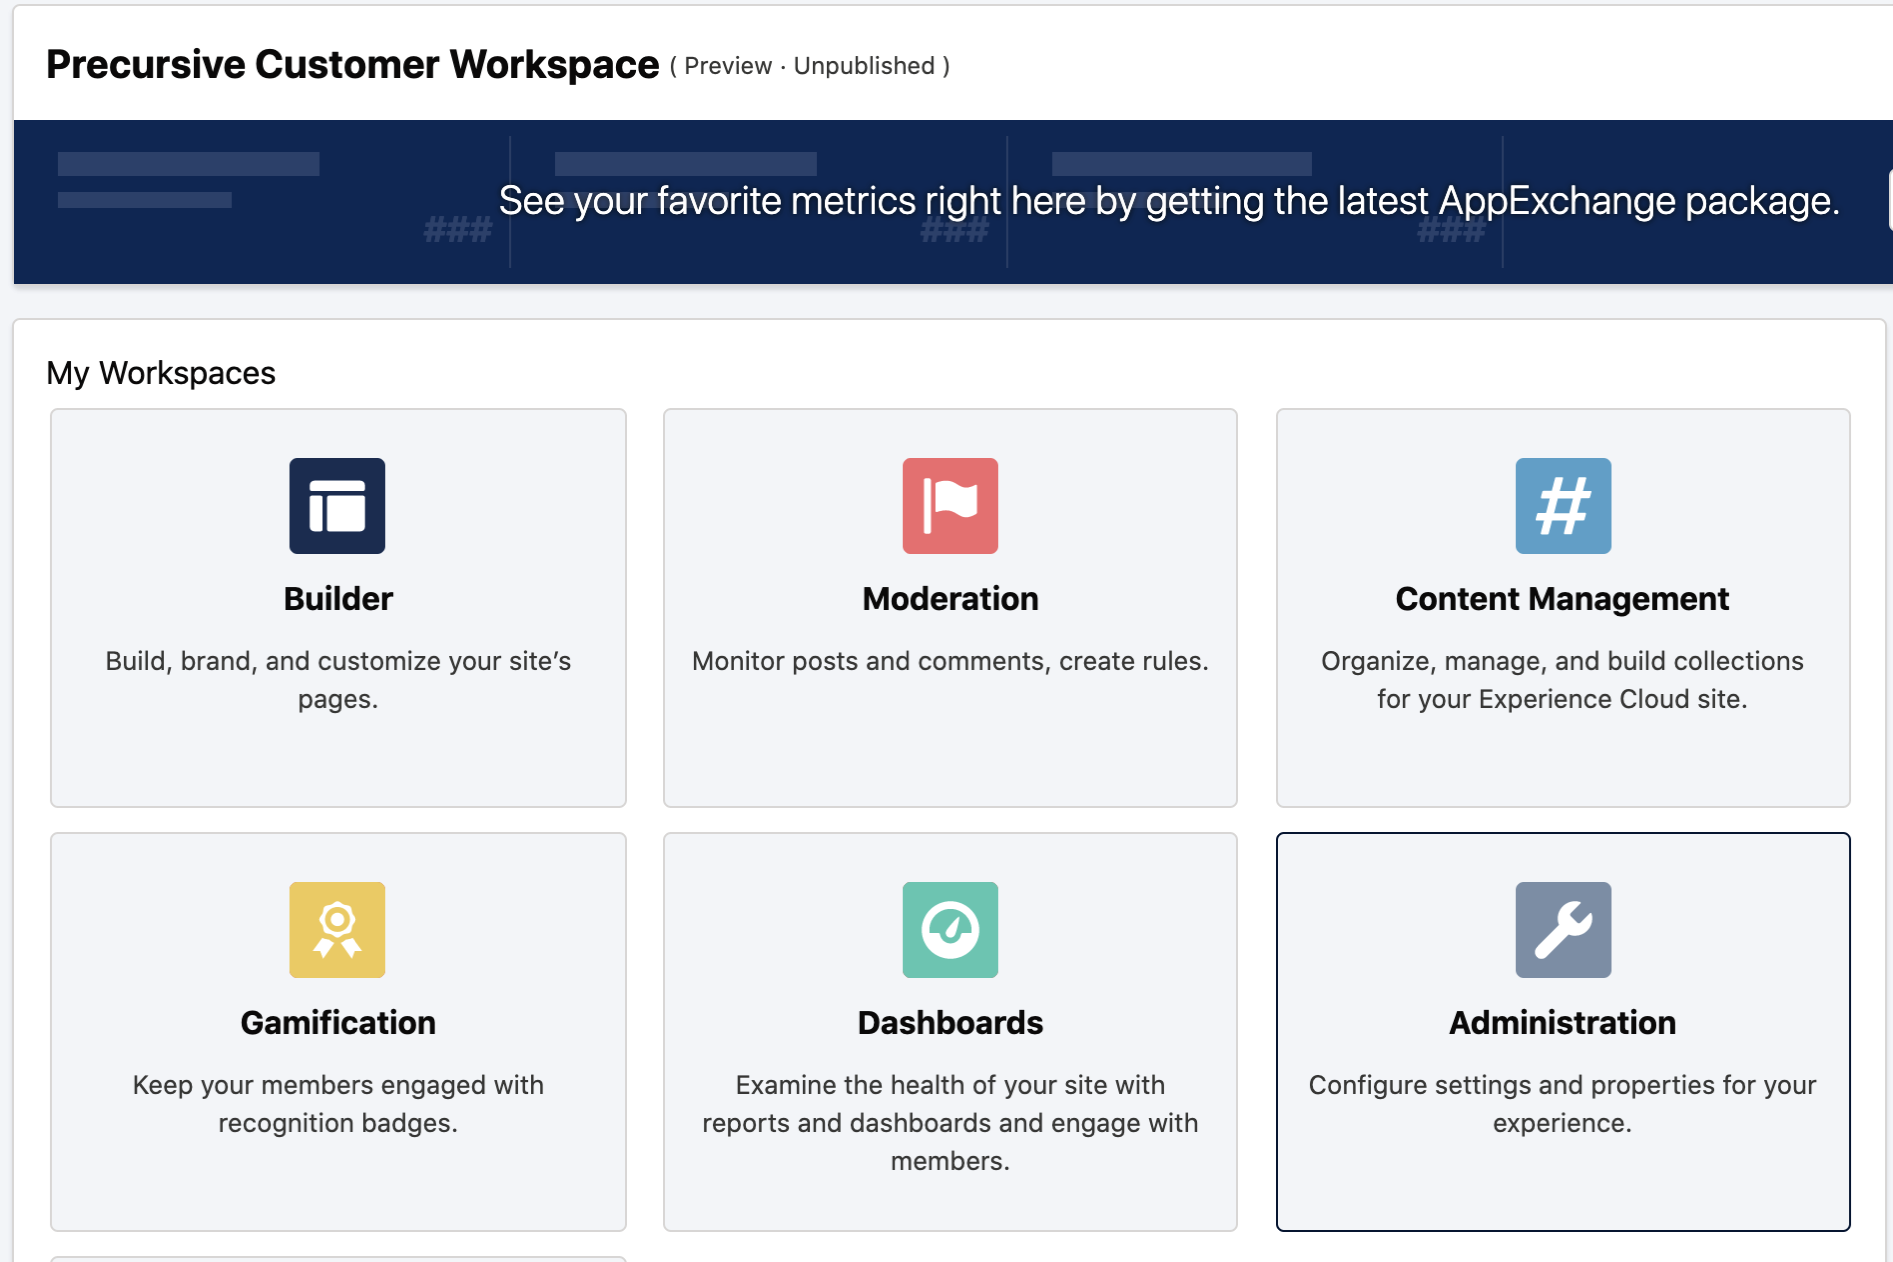
After that, you need to patiently wait up to a few minutes until Salesforce will create a Site and do everything in the background to make it work. You will be redirected to a place from which most of the configuration and customization is available. From this place, the most important options are:
- Builder - tool that allows you to customize Precursive Customer Workspace using Components
- Administration - where all options related to Precursive Customer Workspace are located
Profile and licenses
According to the Salesforce security recommendations, we also strongly recommend cloning one of the default Profiles and rename it to Customer Workspace Profile (or in any way that will fit your organization’s standards).
To find more detailed information about licensing related to Experience Cloud, please review article about Experience Cloud User Licenses and Customer Community Plus License FAQ. Contact our Customer Success Team (customersuccess@precursive.co.uk) to get advice and offers.
There are main differences between ‘Plus’ and ‘non-Plus’ profiles (mostly related to permissions and accesses) and ‘Login’ and ‘non-Login’ profiles (that are linked to licensing).
Clone Profile
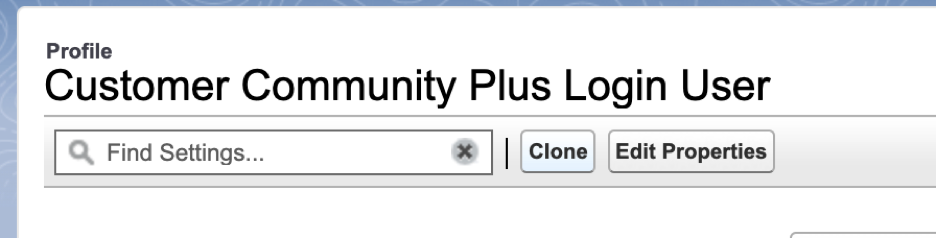
To clone one of the profiles, please go to Setup >> Users >> Profiles, and select one of the default Experience Cloud profiles that fits your organization’s needs (Customer Community- Login User, Plus Login User, Plus User or User).

Then, from the top, please click on Clone button...
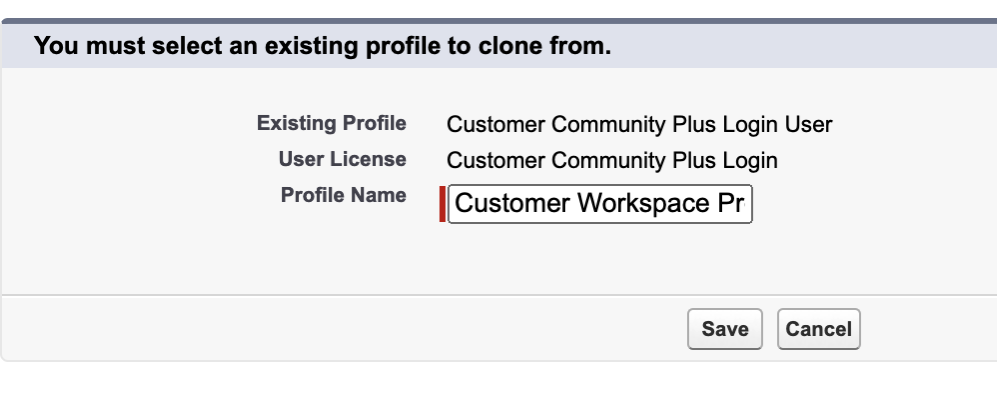
...and provide a new Profile name and click Save
 Permission Set
While installing version Precursive OBX 19.1.2 (or above), we’ve added a Permission Set that is dedicated to use with Customer Workspace. We recommend copying this Permission Set to have the ability to provide some changes if needed that are specific to your organization, security policy or needs.
Permission Set Precursive OBX Customer Workspace User is an object that was designed to make all Precursive Custom Lightning Web Components work for Experience Cloud users.
Salesforce Setup - walk through changes
Sharing Sets
NOTICE: If you are using ‘Plus’ Profiles this section is not applicable for your organization configuration as ‘Plus’ Profiles are skipping Sharing Sets.
If you are using ‘non-Plus’ Profiles, for Community purposes we’ve added an additional field to the Board object that is an additional layer of security - taskfeed1__Account_Community__C. When the Board is made to be visible in Community through OBX Tab, we are copying Account value to that field. This field, then, can be used to build Sharing Set for Experience Cloud.
Please go to Setup >> Feature Settings >> Digital Experiences >> Settings and scroll down to Sharing Sets section when you need to click New.
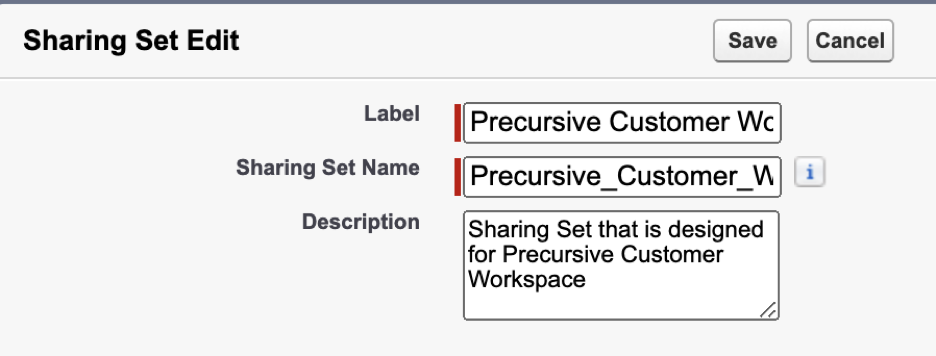
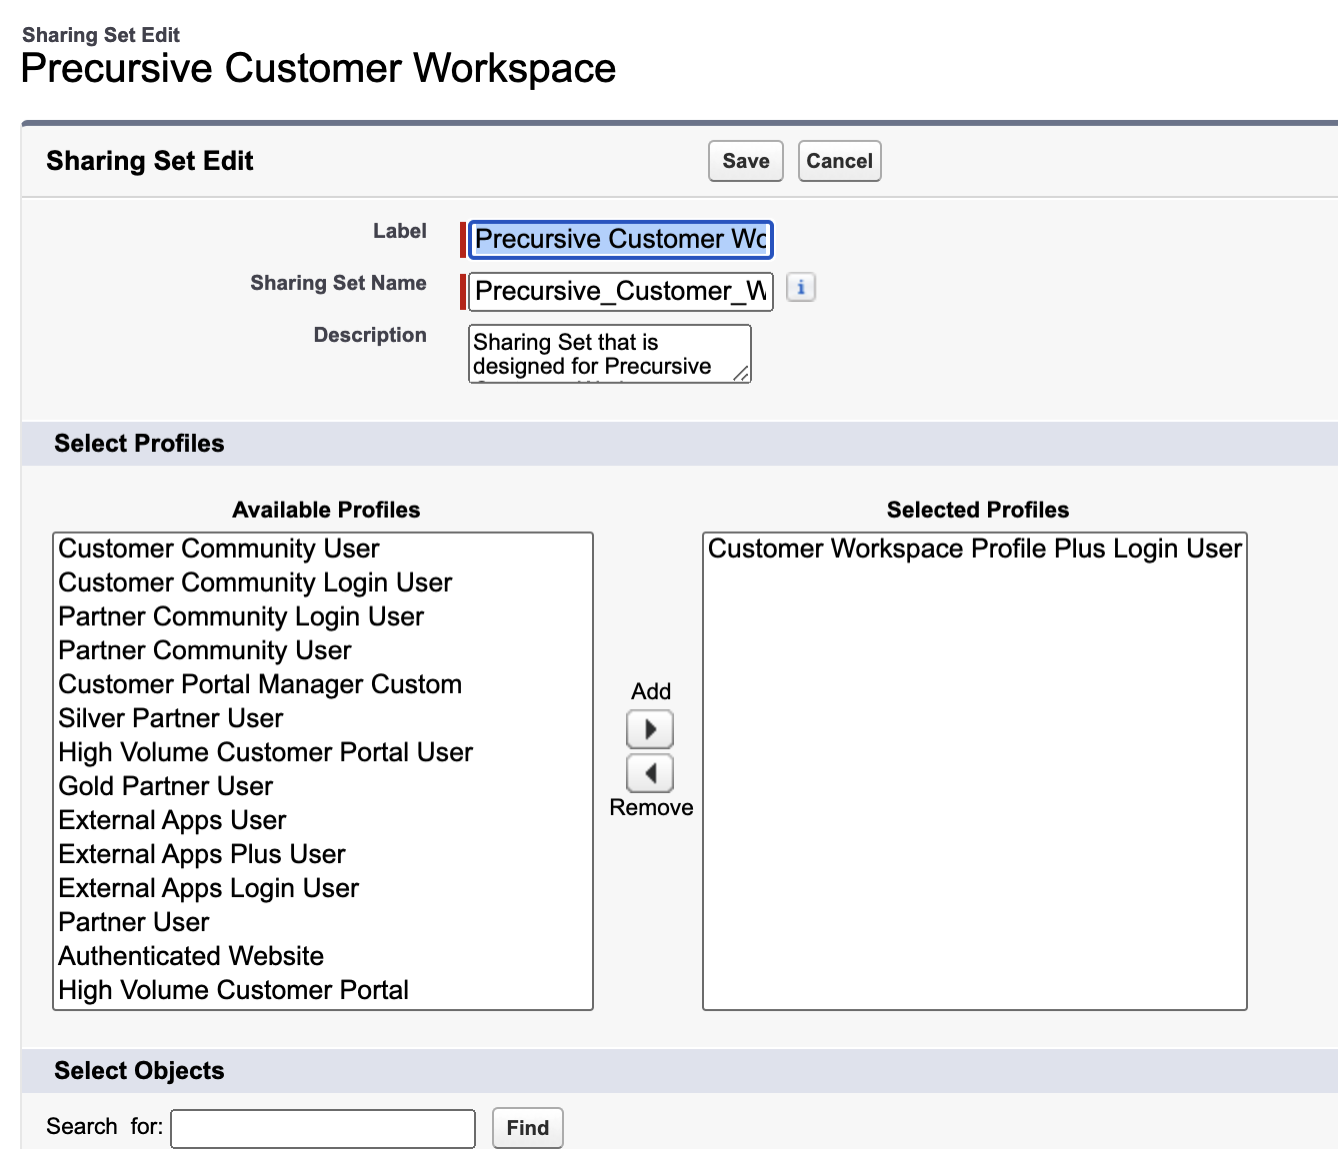
We need to provide Label, Sharing Set Name and Description (optionally).
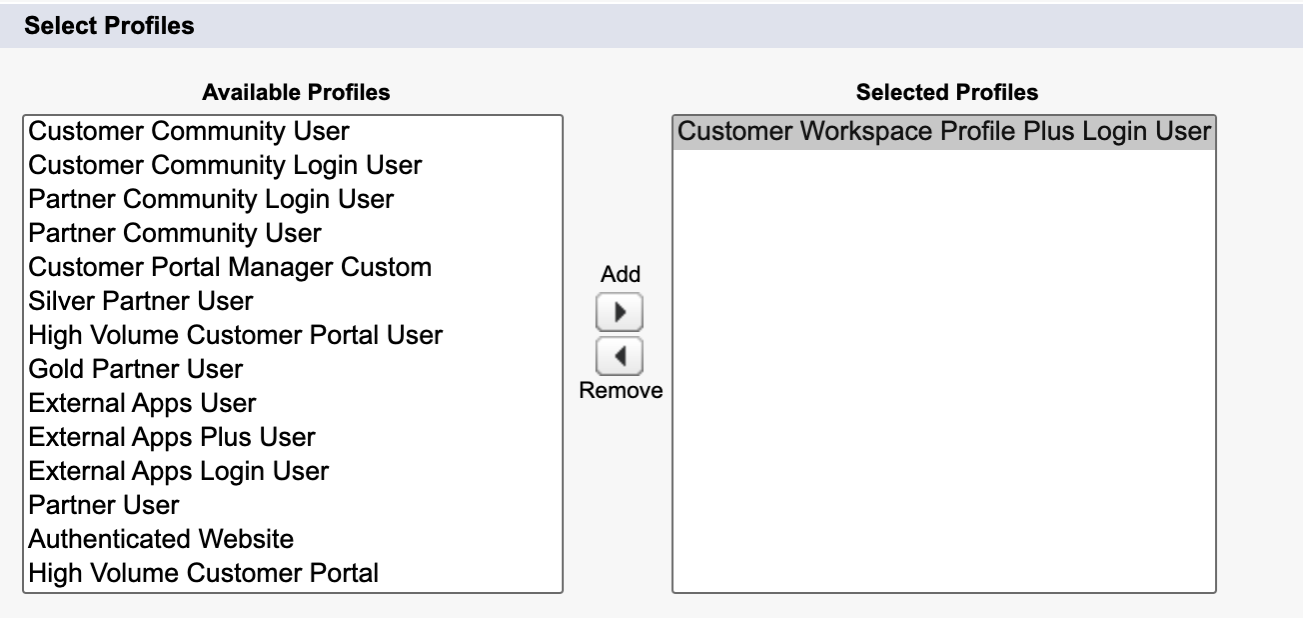
Then we need to select the Profile that we previously created and move it to the Selected Profiles list.
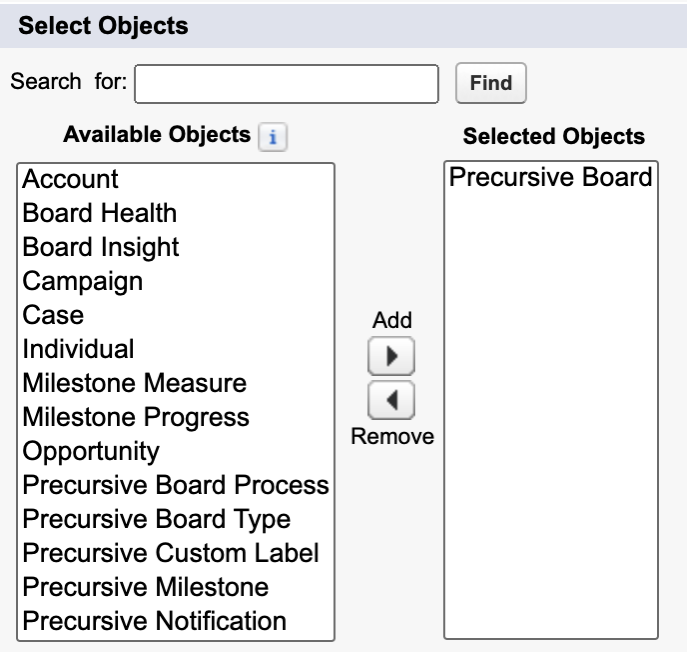
After Profile is moved, we need to move Precursive Board object to list of Selected Objects.
At the bottom, on the Configure Access section Precursive Board object appeared. We need to click on Set Up button next to it

And, on that view provide Mapping details that we want to use. Our recommendation is to provide following values
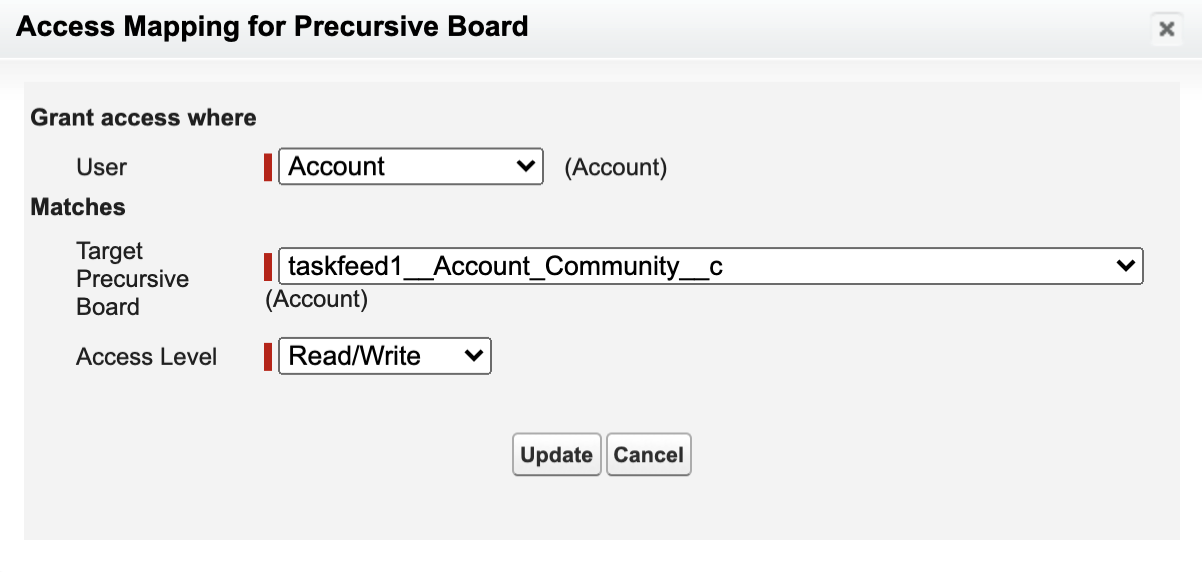
NOTICE: You can also choose taskfeed1__Account__c field as Target Precursive Board but please be aware that it will make all Boards available for the Contact User that is assigned to certain Account instead only for these Boards that are Visible in Community when you pick taskfeed1__Account_Community__c field.
After all previous steps are completed, all we need to do is to click on the Save button.
Global Security Settings
To make data visible through Experience Cloud/Customer Workspace, you need to change some data access settings globally.
Please go to Setup >> Security >> Sharing Settings and click on Edit button next to Organization-Wide Defaults section name

You need to update the selected option in the Default External Access column for following options.
NOTICE: Default External Access can not be more restricted than Default Internal Access which means that if Internally you have something set up as Private and for Customer Workspace purposes Externally you need to have Public Read/Write then you need to have the same level set up for Internal.
NOTICE: As this is general guide that is not covering all edge cases related to data security policy in your organization, please make sure that Data Protection Officer (if exists in your org) is aware of these changes.
In the table below you can find all Objects with security levels needed.
|
Object
|
Default Internal Access
|
Default External Access
|
Notice
|
|
Account, Contract and Asset
|
-
|
Public Read/Write
|
This will make all Accounts and Contacts visible for Standard Users
|
|
Contact
|
Public Read Only
|
Public Read Only
|
-
|
|
Milestone Measure
|
-
|
Public Read Only
|
-
|
|
Milestone Progress
|
-
|
Public Read Only
|
-
|
|
Precursive Board Process
|
-
|
Public Read Only
|
-
|
|
Precursive Board Type
|
-
|
Public Read Only
|
-
|
|
Precursive Custom Label
|
-
|
Public Read Only
|
-
|
|
Precursive Milestone
|
-
|
Public Read Only
|
-
|
|
Precursive Task Category
|
-
|
Public Read Only
|
-
|
When all changes are provided, click Save and accept the modal that informs you that these changes can take some time.
Customer Workspace Configuration
Link Profile that will have access to Experience Cloud/Customer Workspace
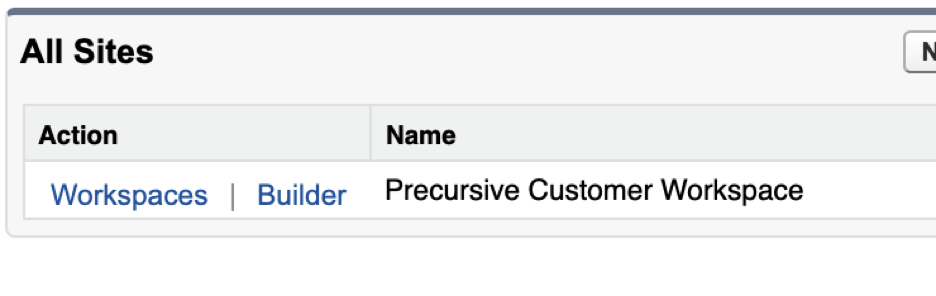
From Setup >> Feature Settings >> Digital Experiences >> All Sites, please click on Workspaces button that is inline with the Precursive Customer Workspace site that will open a new page.

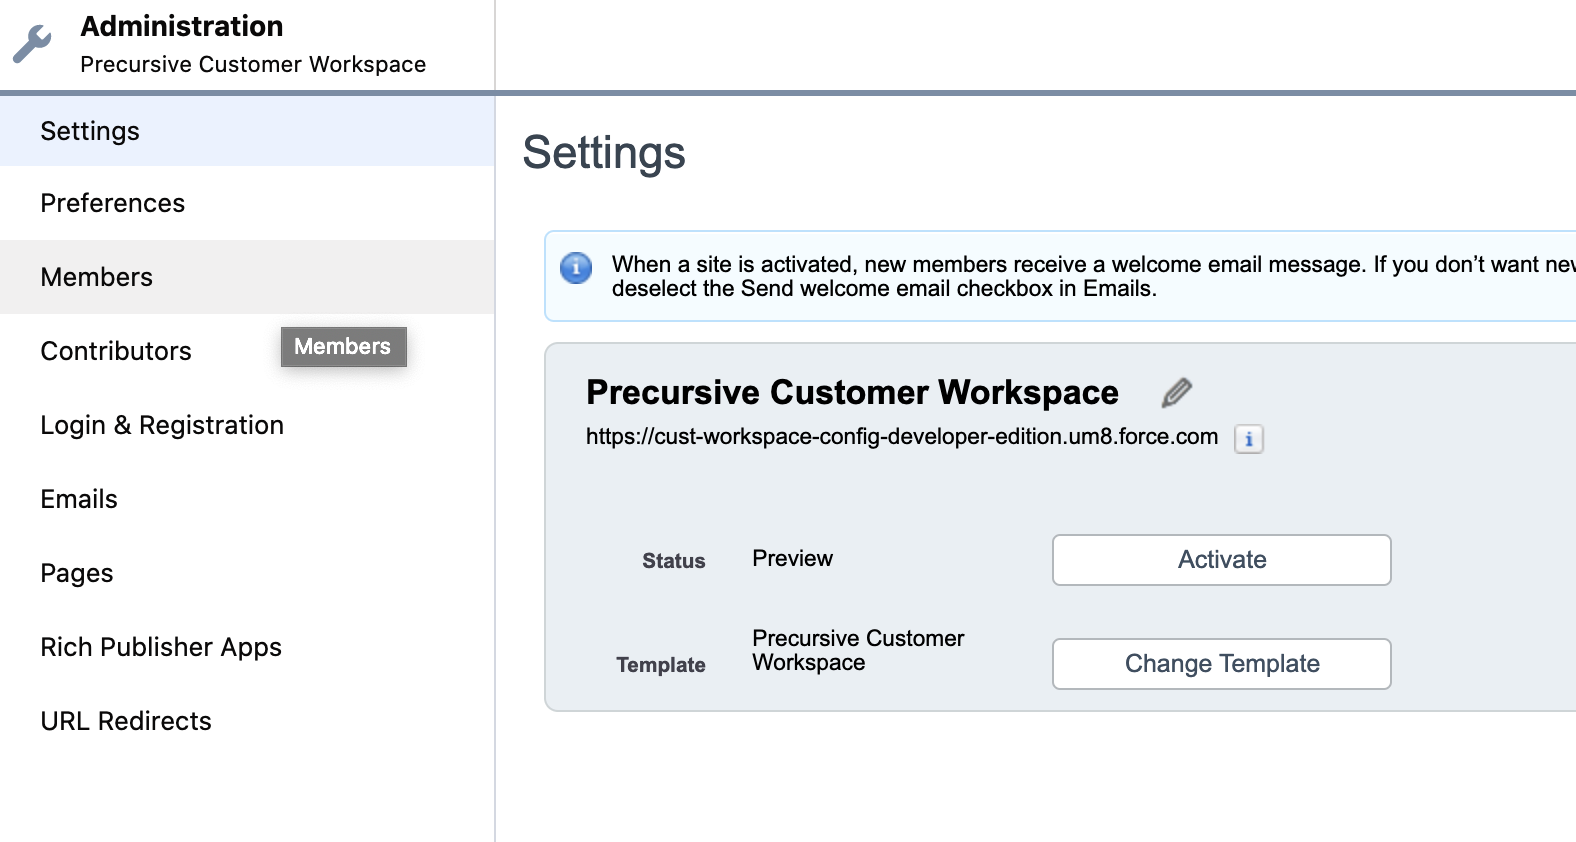
From this page, please go to Administration.
From left side pane, please click on Members.
NOTICE:
 From that view, we have two options to link Users with Customer Workspace. We can use Profiles or Permission Sets by moving these dedicated for Customer Workspace to Selected Profiles or Permission Sets. We recommend to use Permission Sets but if your organization for some reason would like to use Profiles instead, not a problem.
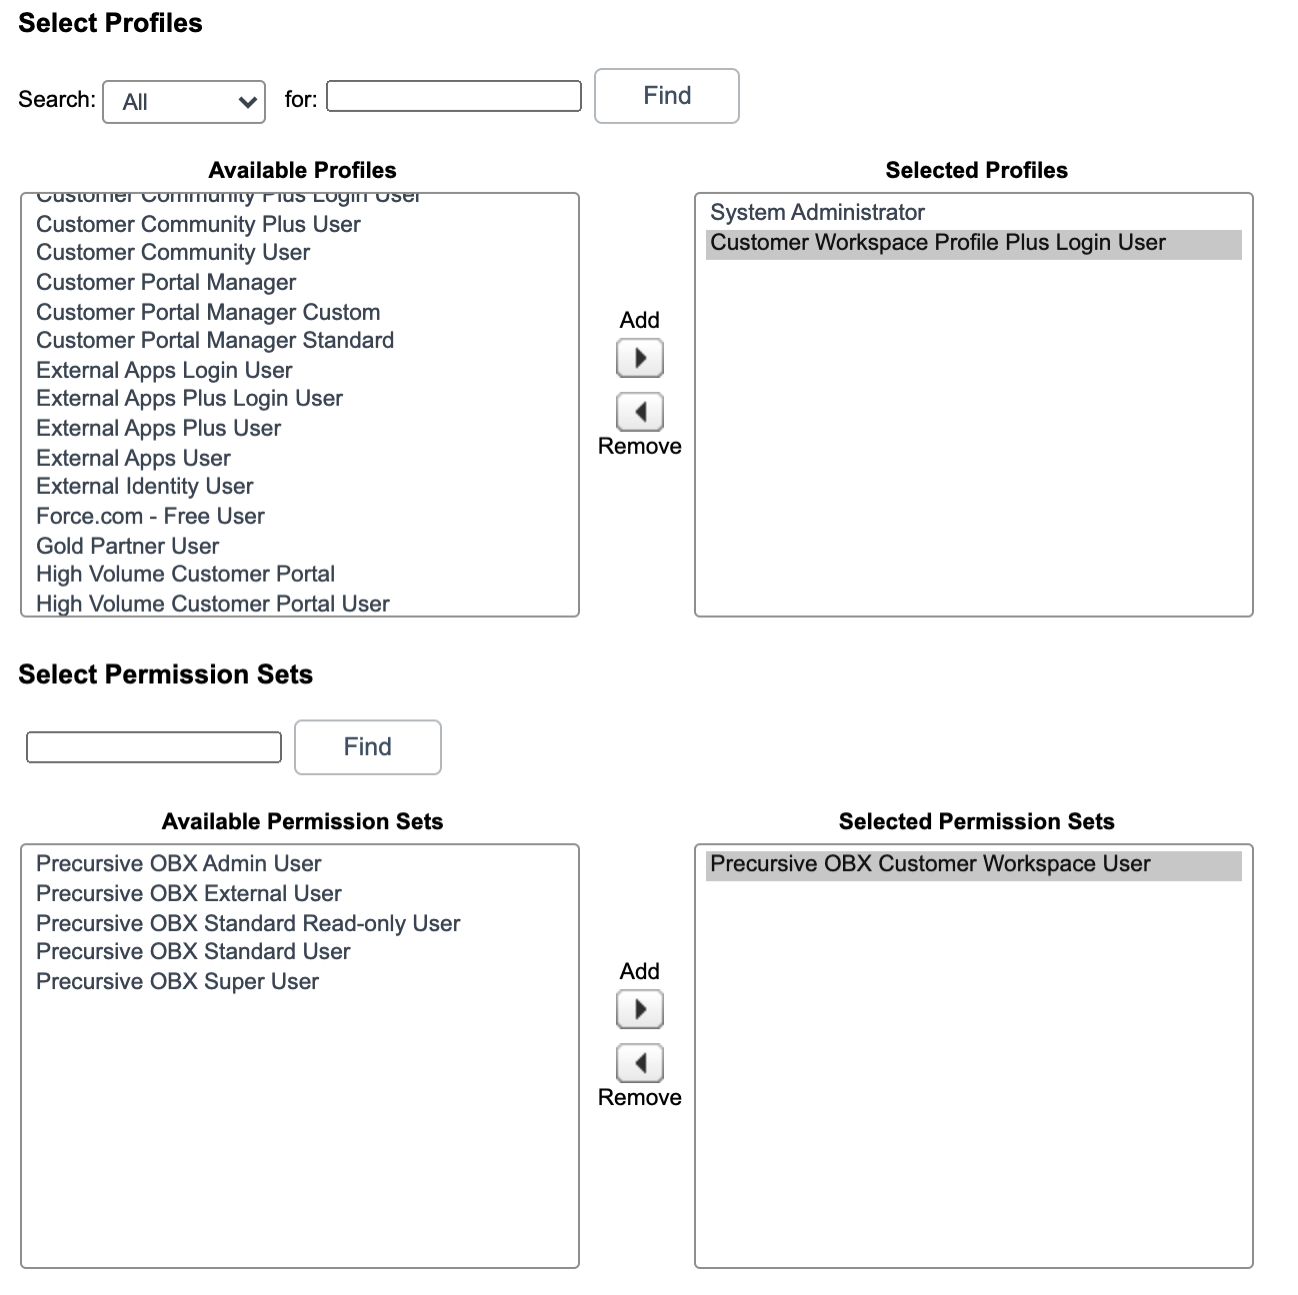
NOTICE: Removing System Administrator from Selected Profiles will make this page not accessible and you won’t be able to manage this Site anymore.
After all changes are applied, please click on Save button.
Activate Customer Workspace
After following instructions from this article: How to configure OBX to work with Customer Workspace?
all you need to do is to Activate the Customer Workspace.
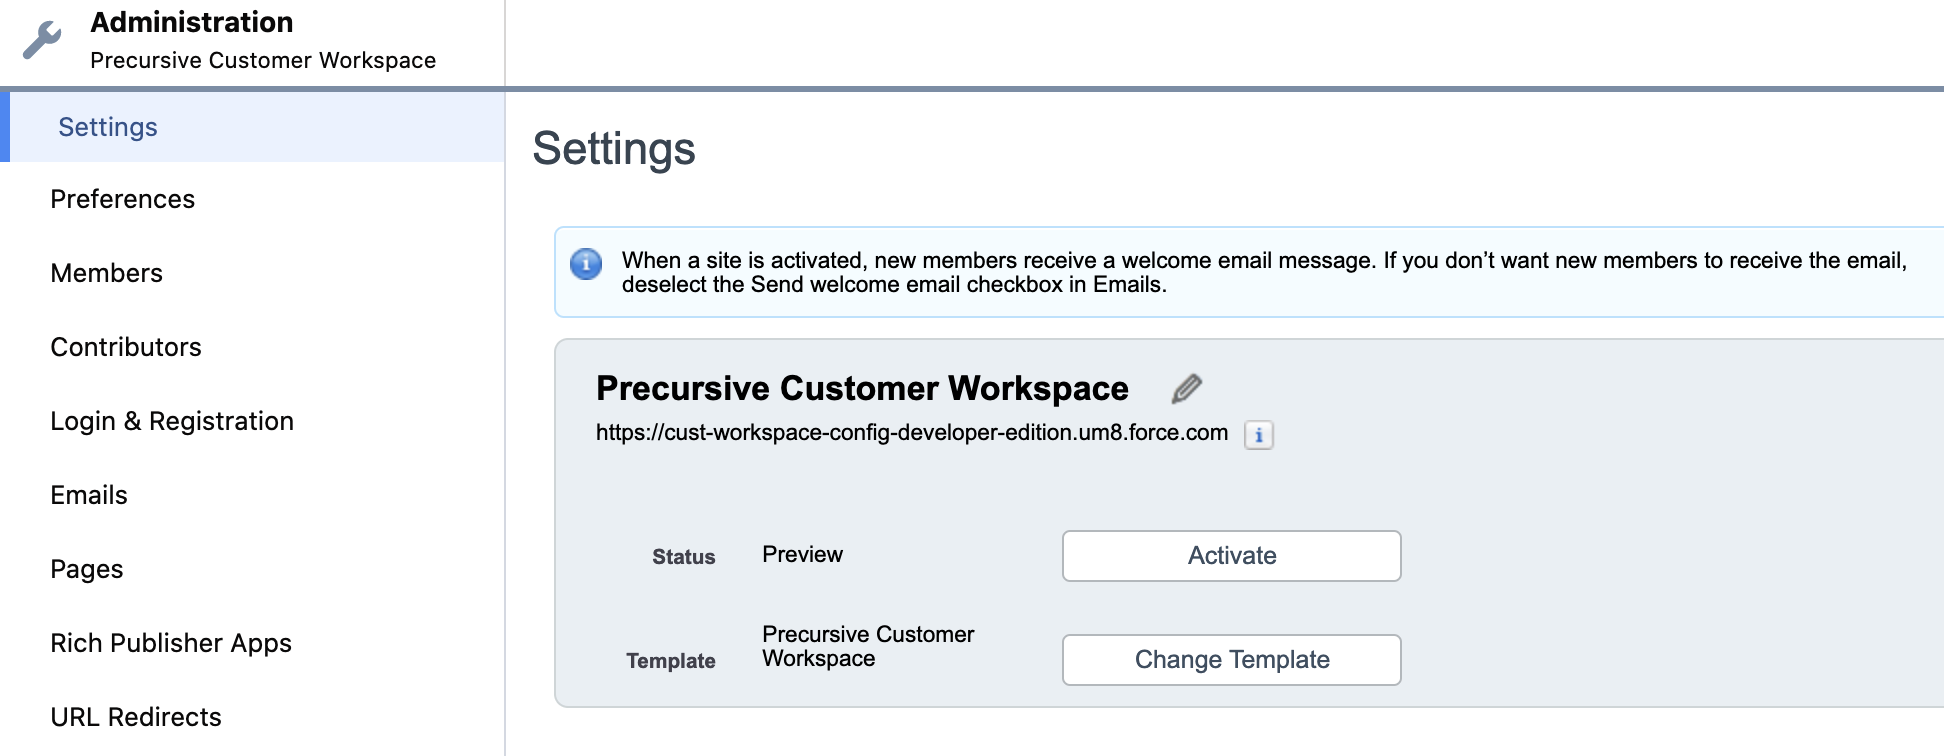
From the Administration page in Workspaces, please select Settings from left side pane and click on Activate button.
OBX Application settings
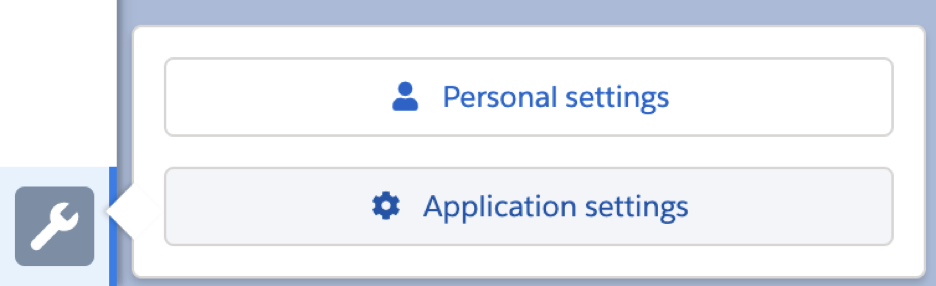
On OBX Tab, from bottom left corner, please click on the wrench icon and go to Application Settings.
Then, from the tab list please go to CUSTOMER WORKSPACE SETTINGS and provide the following values that are essential for linking Precursive Customer Workspace with Precursive OBX:
- Customer Workspace name - an exact name that your Experience Site was created with
- User Profile Name - this Profile will be assigned, by default, to all invited Contact Users through Precursive OBX. This name has to be exactly the same as Profile Name in Setup >> Users >> Profiles
- Users Permission Set Name - this Permission Set will be assigned, by default, to all invited Contact Users through Precursive OBX. This name has to be exactly the same as Permission Set in Setup >> Permission Sets
- Username Suffix - to avoid situations when your Customers nickname is used in another Salesforce instance and is not unique you can add suffix for all Contact Users to make sure that it won’t make any duplicated Usernames across all Salesforce instances.
- Email Encoding, Language, Locale and Time Zone should be changed only when they does not fit your organization default settings for users
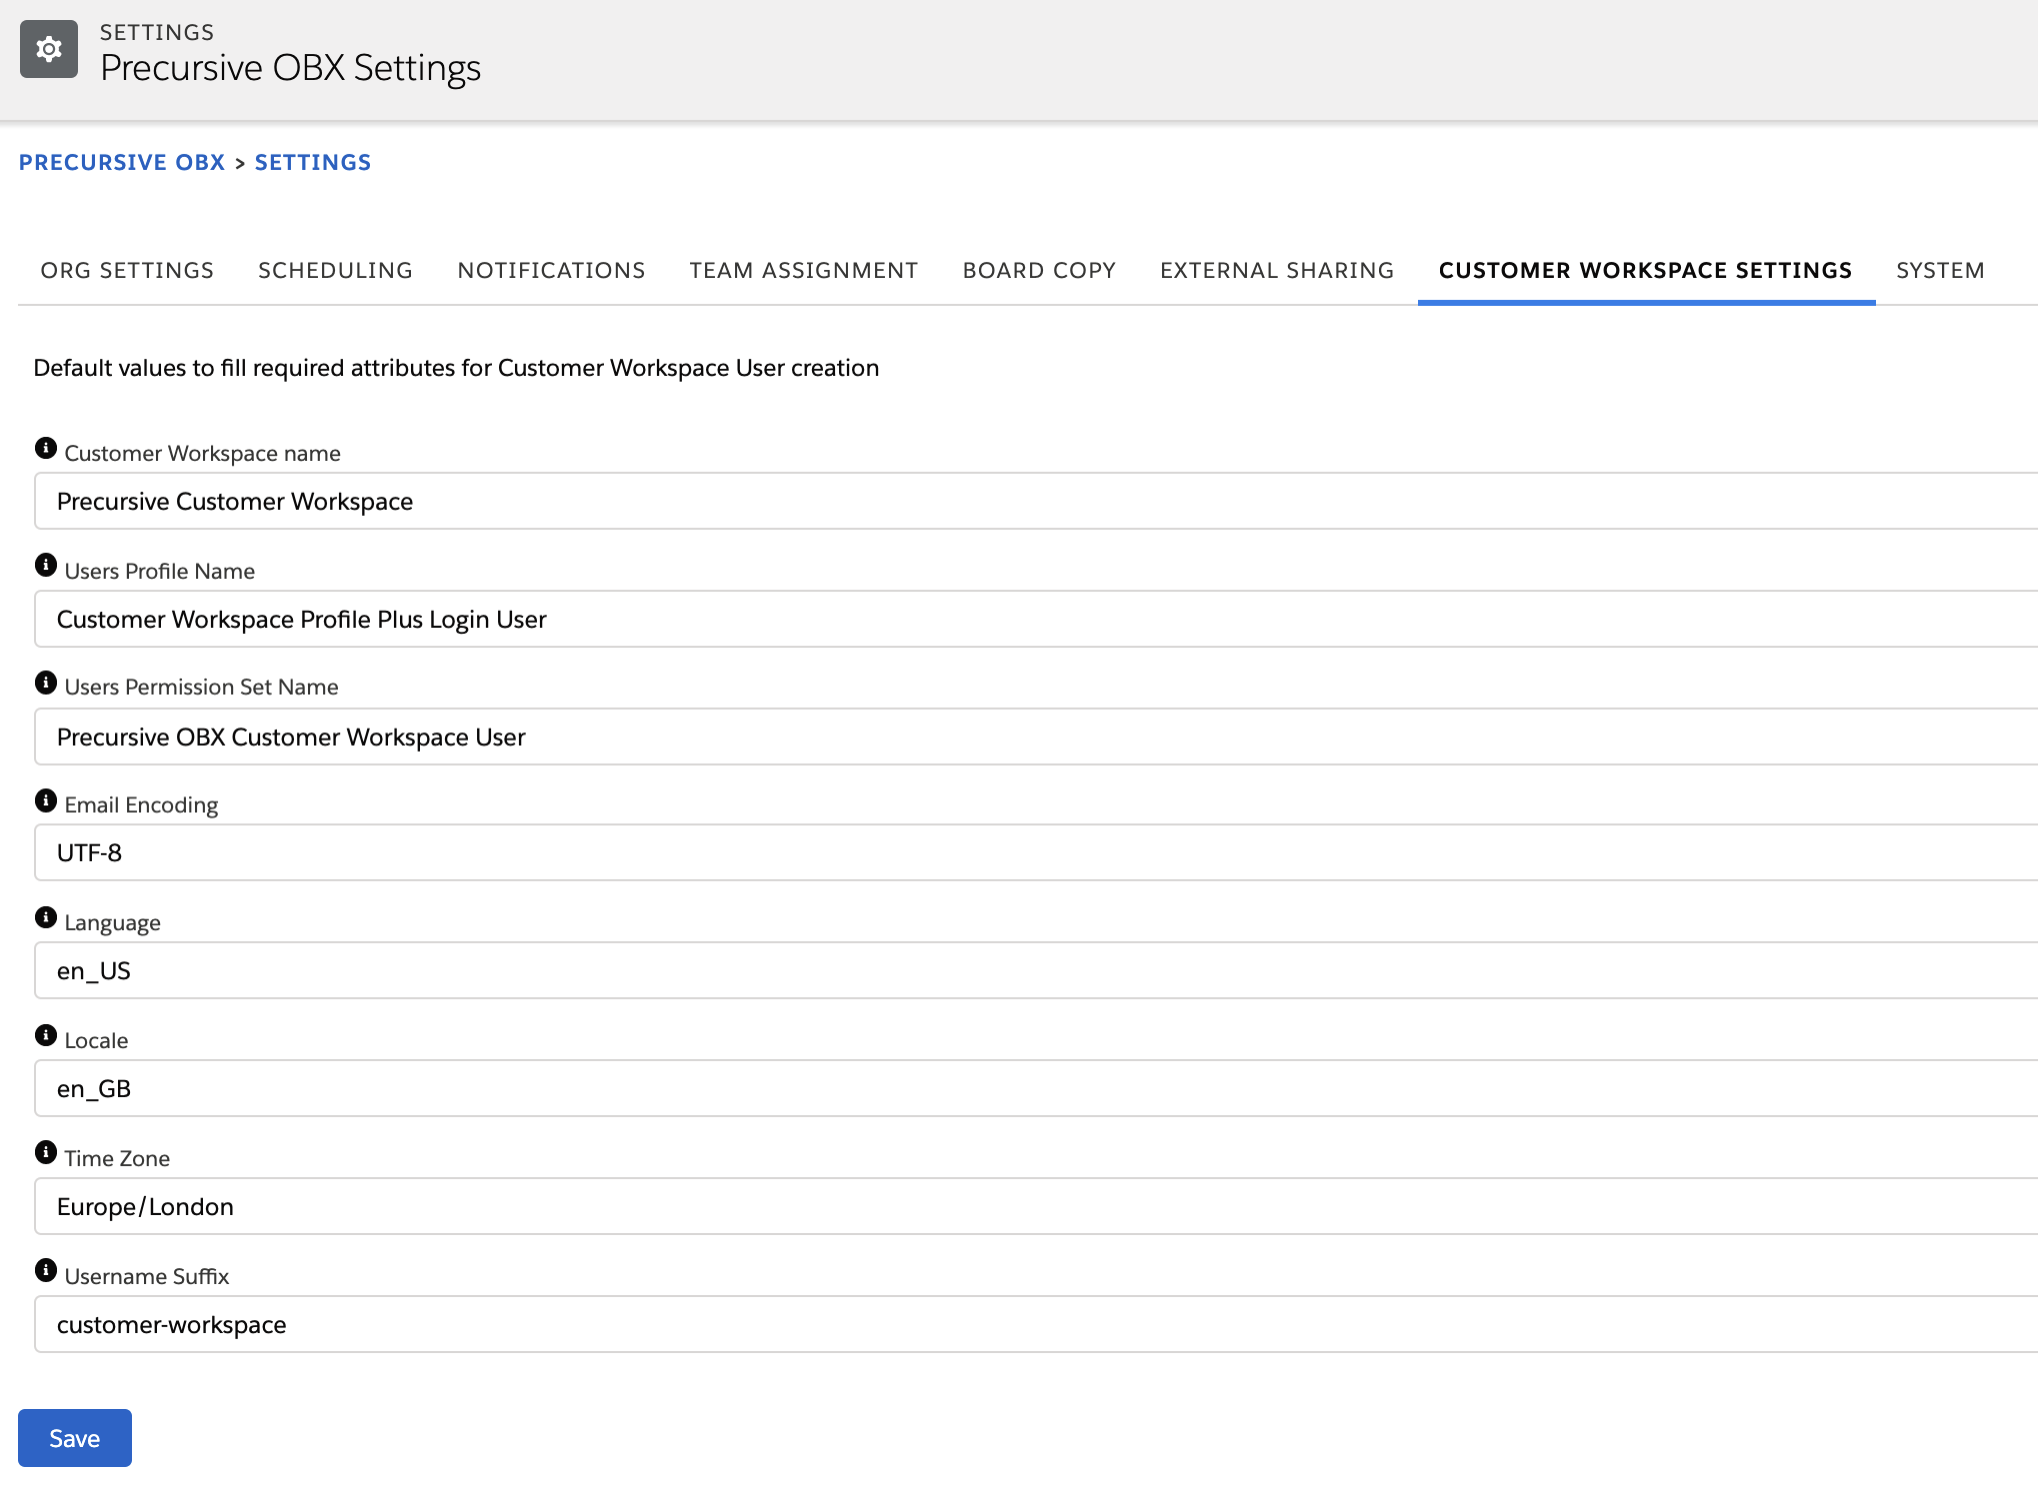
Once all details are provided, please click on the Save button.
Default filters for Components on Home Page
By default, filter names on Lightning Web Components that are embedded on the Home Page of Customer Workspace are empty. It means that for Boards we are displaying Recent Boards and for Tasks we are displaying currently logged in User’s Tasks. It also means that not all security attributes are taken into account while filtering and to prevent uncontrolled data exposure we need to create filters dedicated to Customer Workspace and add them to components through Builder.
Create OBX Filters
Follow this instruction to Create OBX Filters. Make sure that “Do not show as Menu Item” option is checked for both of them. Below you can find details for each of these Filters:
Customer Workspace - My Tasks
This filter will show all Tasks that Contact User is Contributing to excluding all Tasks that are Internal Only or are in Boards that are not Visible in Community.
Label: Customer Workspace My Tasks
Precursive OBX Filter Name: Customer_Workspace_My_Tasks
SObject: Task
Type: SOQL
List View API Name: leave empty
SOQL Condition Expression:
taskfeed1__Is_Contributor__c = true AND
taskfeed1__Board__r.taskfeed1__Archived__c = false AND
taskfeed1__Archived__c = false AND
(
  taskfeed1__Complete__c = false OR
  (taskfeed1__Complete__c = true AND taskfeed1__Complete_Date__c = TODAY)
) AND
taskfeed1__Board__r.taskfeed1__Is_Template__c = false AND
taskfeed1__Board__r.taskfeed1__Community_Visible__c = true AND
taskfeed1__Internal__c = false
Customer Workspace - My Boards
This filter will show all Boards that Contact User is Board Team Member of excluding all Boards that are not Visible in Community.
Label: Customer Workspace My Boards
Precursive OBX Filter Name: Customer_Workspace_My_Boards
SObject: Board
Type: SOQL
List View API Name: leave empty
SOQL Condition Expression:
Id IN
  (SELECT taskfeed1__Board__c FROM taskfeed1__Board_Team_Member__c WHERE taskfeed1__User__c = :runningUserId) AND
taskfeed1__Archived__c = false AND
taskfeed1__Is_Template__c = false AND
taskfeed1__Community_Visible__c = true
Customer Workspace - Board's Tasks that require attention
This filter will show all Tasks from the selected board that Contact User is assigned to and that are Ready.
Label: Customer Workspace Ready Tasks
Precursive OBX Filter Name: Customer_Workspace_Ready_Tasks
SObject: Task
Type: SOQL
List View API Name: leave empty
SOQL Condition Expression:
taskfeed1__Is_Contributor__c = true AND taskfeed1__Board__r.taskfeed1__Archived__c = false AND taskfeed1__Archived__c = false AND (taskfeed1__Complete__c = false OR (taskfeed1__Complete__c = true AND taskfeed1__Complete_Date__c = TODAY)) AND taskfeed1__Board__r.taskfeed1__Is_Template__c = false AND taskfeed1__Internal__c = false AND
taskfeed1__Board__c = :recordId AND
taskfeed1__Ready__c = true
Assign Filters to Components
From Setup >> Feature Settings >> Digital Experiences >> All Sites, please click on the Builder button that is in line with the Precursive Customer Workspace site that will open a new page.
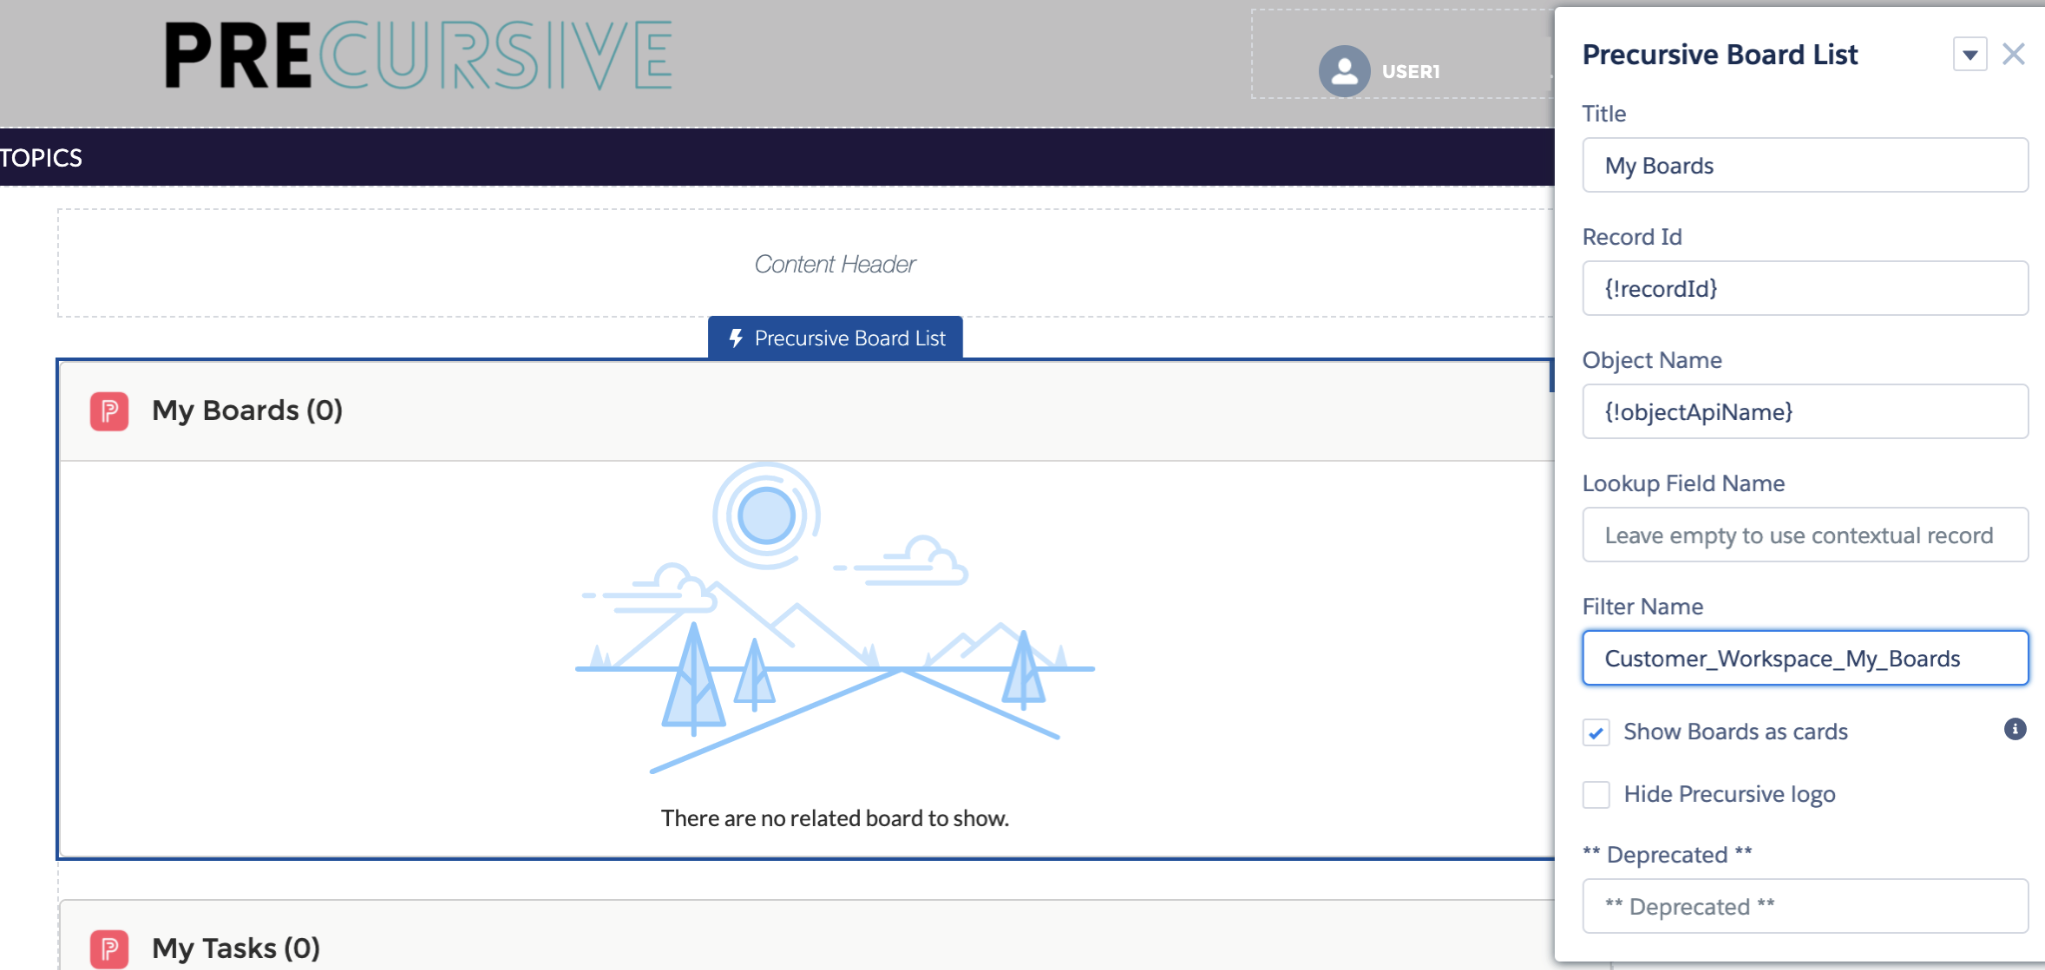
 In Builder, click on My Boards Component and provide the Filter Name that you recently created.
The same for the My Tasks Component and respective filter that was created.
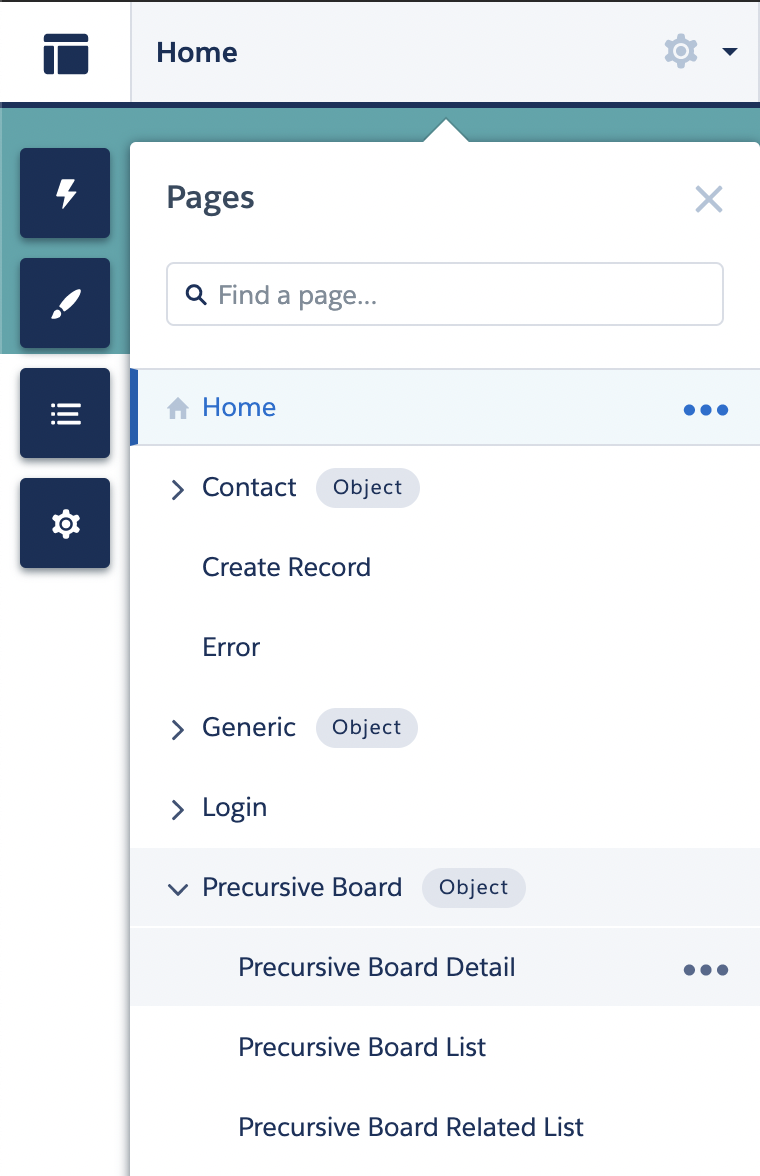
Then, from the top drop-down please select Precursive Board Detail
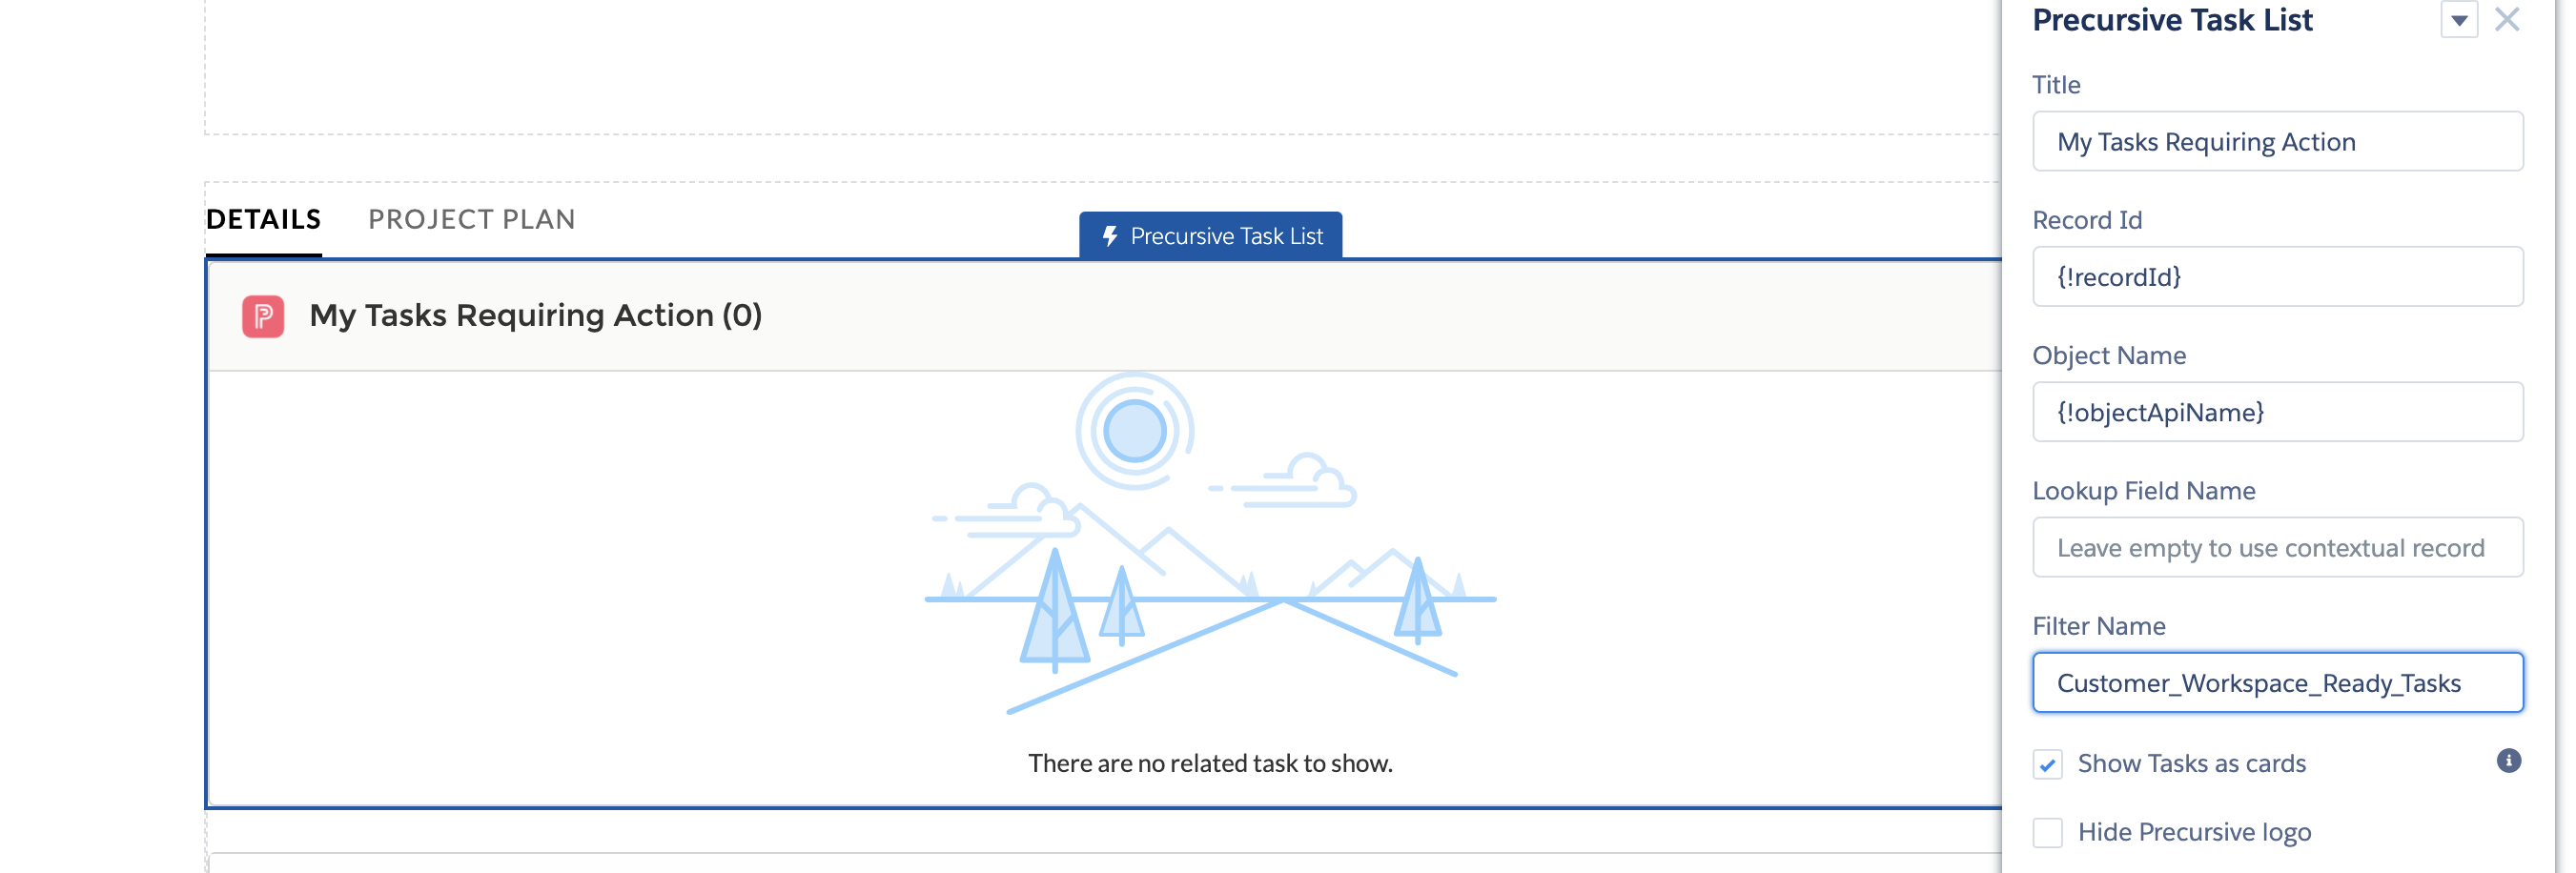
On the loaded page, please click on the Precursive Task List component with header My Tasks Requiring Action and in Filter Name provide Customer_Workspace_Ready_Tasks.
Once all filters are set up, you need to click on Publish to make changes visible for end-users. For more information on how to customize Bolt Template please review this article.
Make data visible through Customer Workspace
Data visibility - the checklist
In a default configuration, all conditions need to be met to make data available for Contact Users through Customer Workspace:
- Permission Set and Profile assigned that match previous configuration
- Board linked with Account
- Contact User assigned to Board as Board Team Member (for Boards visibility)
- Contact User assigned to Task as Task Contributor (for Tasks visibility)
- Board marked as “Visible in Community”
- The user who is an Account Owner need to have a Role assigned
- Contact User has following attributes fulfilled: First Name, Last Name, E-mail Address
- Contact User invited through OBX Tab or manually through Salesforce Setup
Make Boards Visible in Community
First step to make Projects accessible through Customer Workspace is to mark Board as Visible in Community.
From OBX Tab, please select a Board that you would like to make visible in Community. From the drop-down please select the Share button...
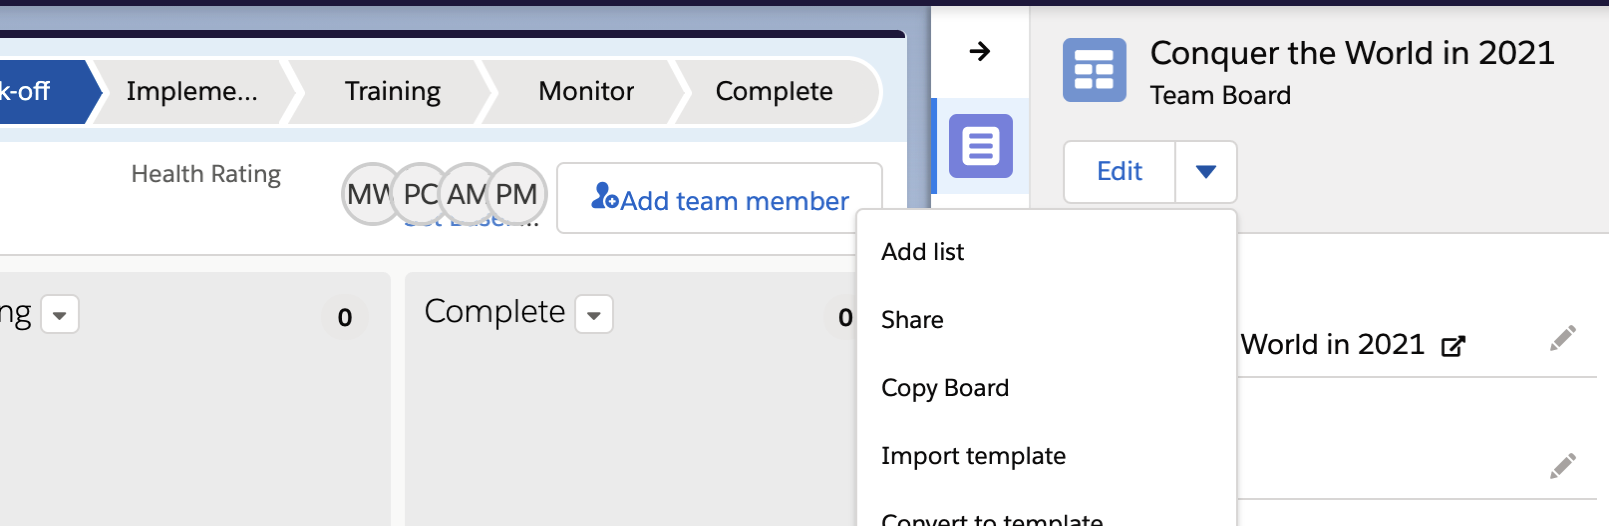
...then go to Customer Workspace tab and tick checkbox next to Visible in Customer Workspace.
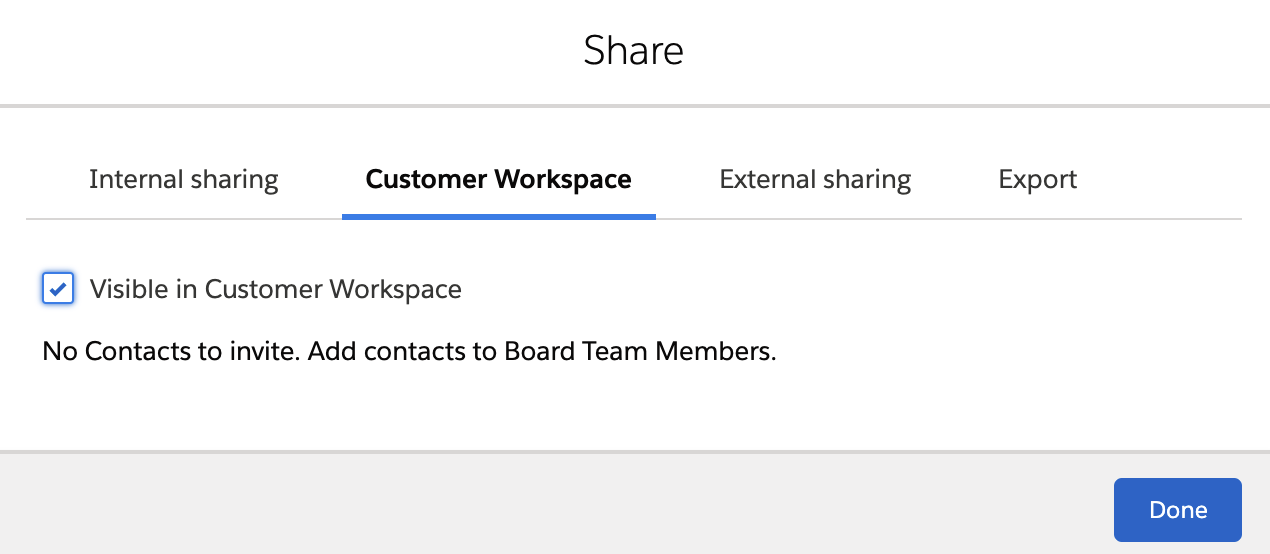
When you see this notification that there are “No Contacts to invite…” it means that Contact has to be assigned as Board Team Member (and as Task Contributor if required). Please review how to manage Board Team Members and assign Contact as Task Contributors.
Invite Contact Users
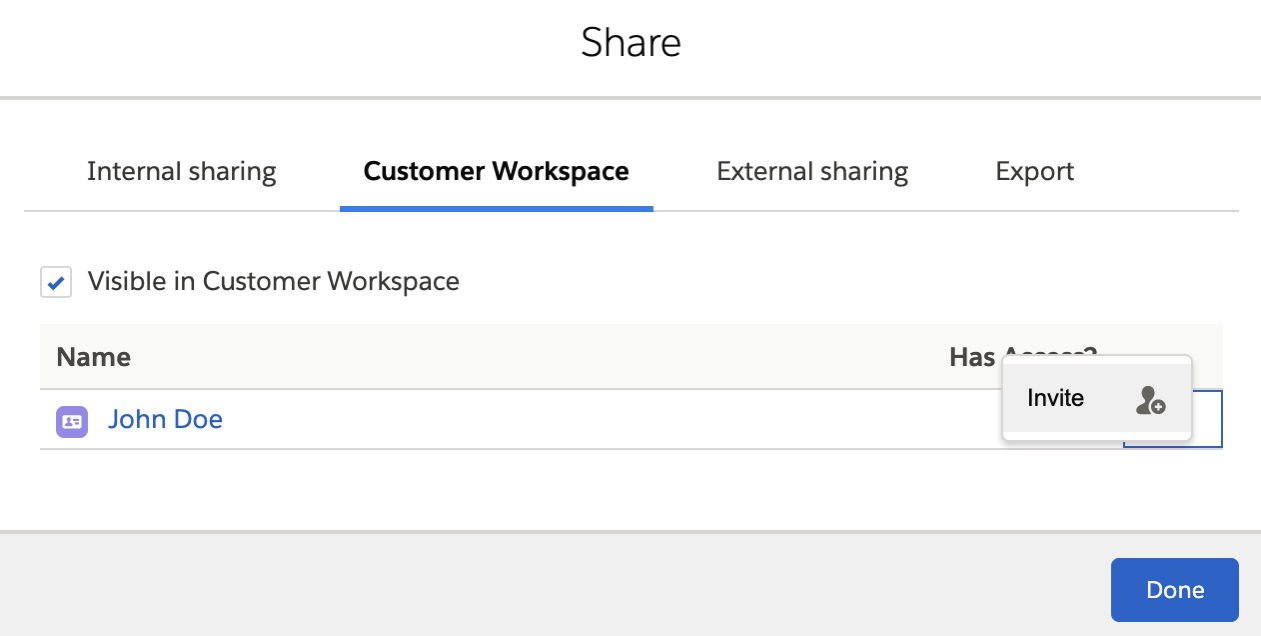
Once Contact is assigned to Board, we are able to invite this Contact to Customer Workspace.
From the Customer Workspace tab, all we need to do is to click on Invite next to certain Contact that we want to invite. In the background, the user account is created and set up according to settings provided through Application Settings >> Customer Workspace Settings.
Once clicked, invitation was sent and after setting up an user’s account, Contact will be able to access projects through Customer Workspace.