About
Proximity Search allows you to search for resources that are the closest to your project site.
To start using the Distance filter while looking for your resources to be assigned to a project, first you will need to get a Google API key which enables this functionality. This Google API service is payable.To see what is the pricing visit this website: Google Geocoding API Usage and Billing
The API key is a unique identifier that authenticates requests associated with your project for usage and billing purposes.
Once you have set it up, you can navigate to the article below to learn How to Use Proximity Search.
Setup
Create an API key
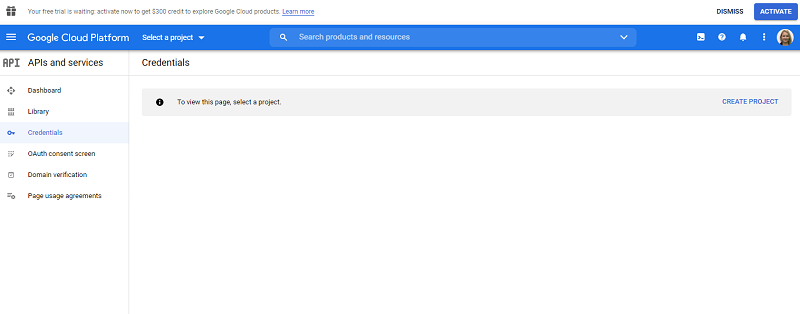
Go to: Using API Keys | Geocoding API and press ‘Go to Credentials page’. If you haven’t any project on the Google Cloud Platform, select the Country and agree with Terms of Service. Then select Create Project.
Paste Precursive Proximity Search into the Name field, then provide the Organization and Location.
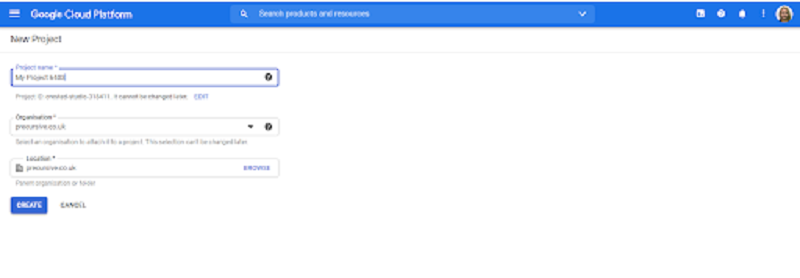
The project may take a moment to be created. If this is your first Google Cloud project you will be asked to Activate at the top of the page to set up your billing details.
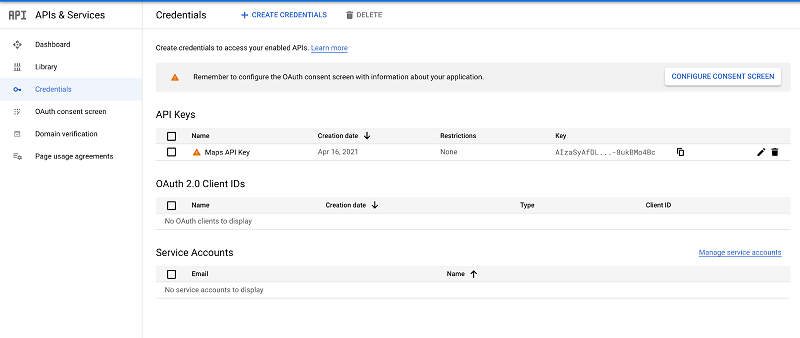
Then, From the Maps APIs and Services page select Geocoding API, then Enable. Once enabled, navigate back to the Credentials section, you will be able to see your API key and copy it from there. If you do not see an API key then select Create Credentials near the top of the screen.
NOTE: We recommend you restrict your API Key to prevent unpermitted use. Learn how to add restrictions here.
Enable the Proximity Search in your Salesforce instance
Navigate to the Setup>>Remote Site Settings>>New Remote Site and name the site Geocode and paste the following URL: https://maps.googleapis.com Navigate to the Setup >> Custom Settings >> Precursive Global Settings >> Google API key and paste your key there. Then Save.
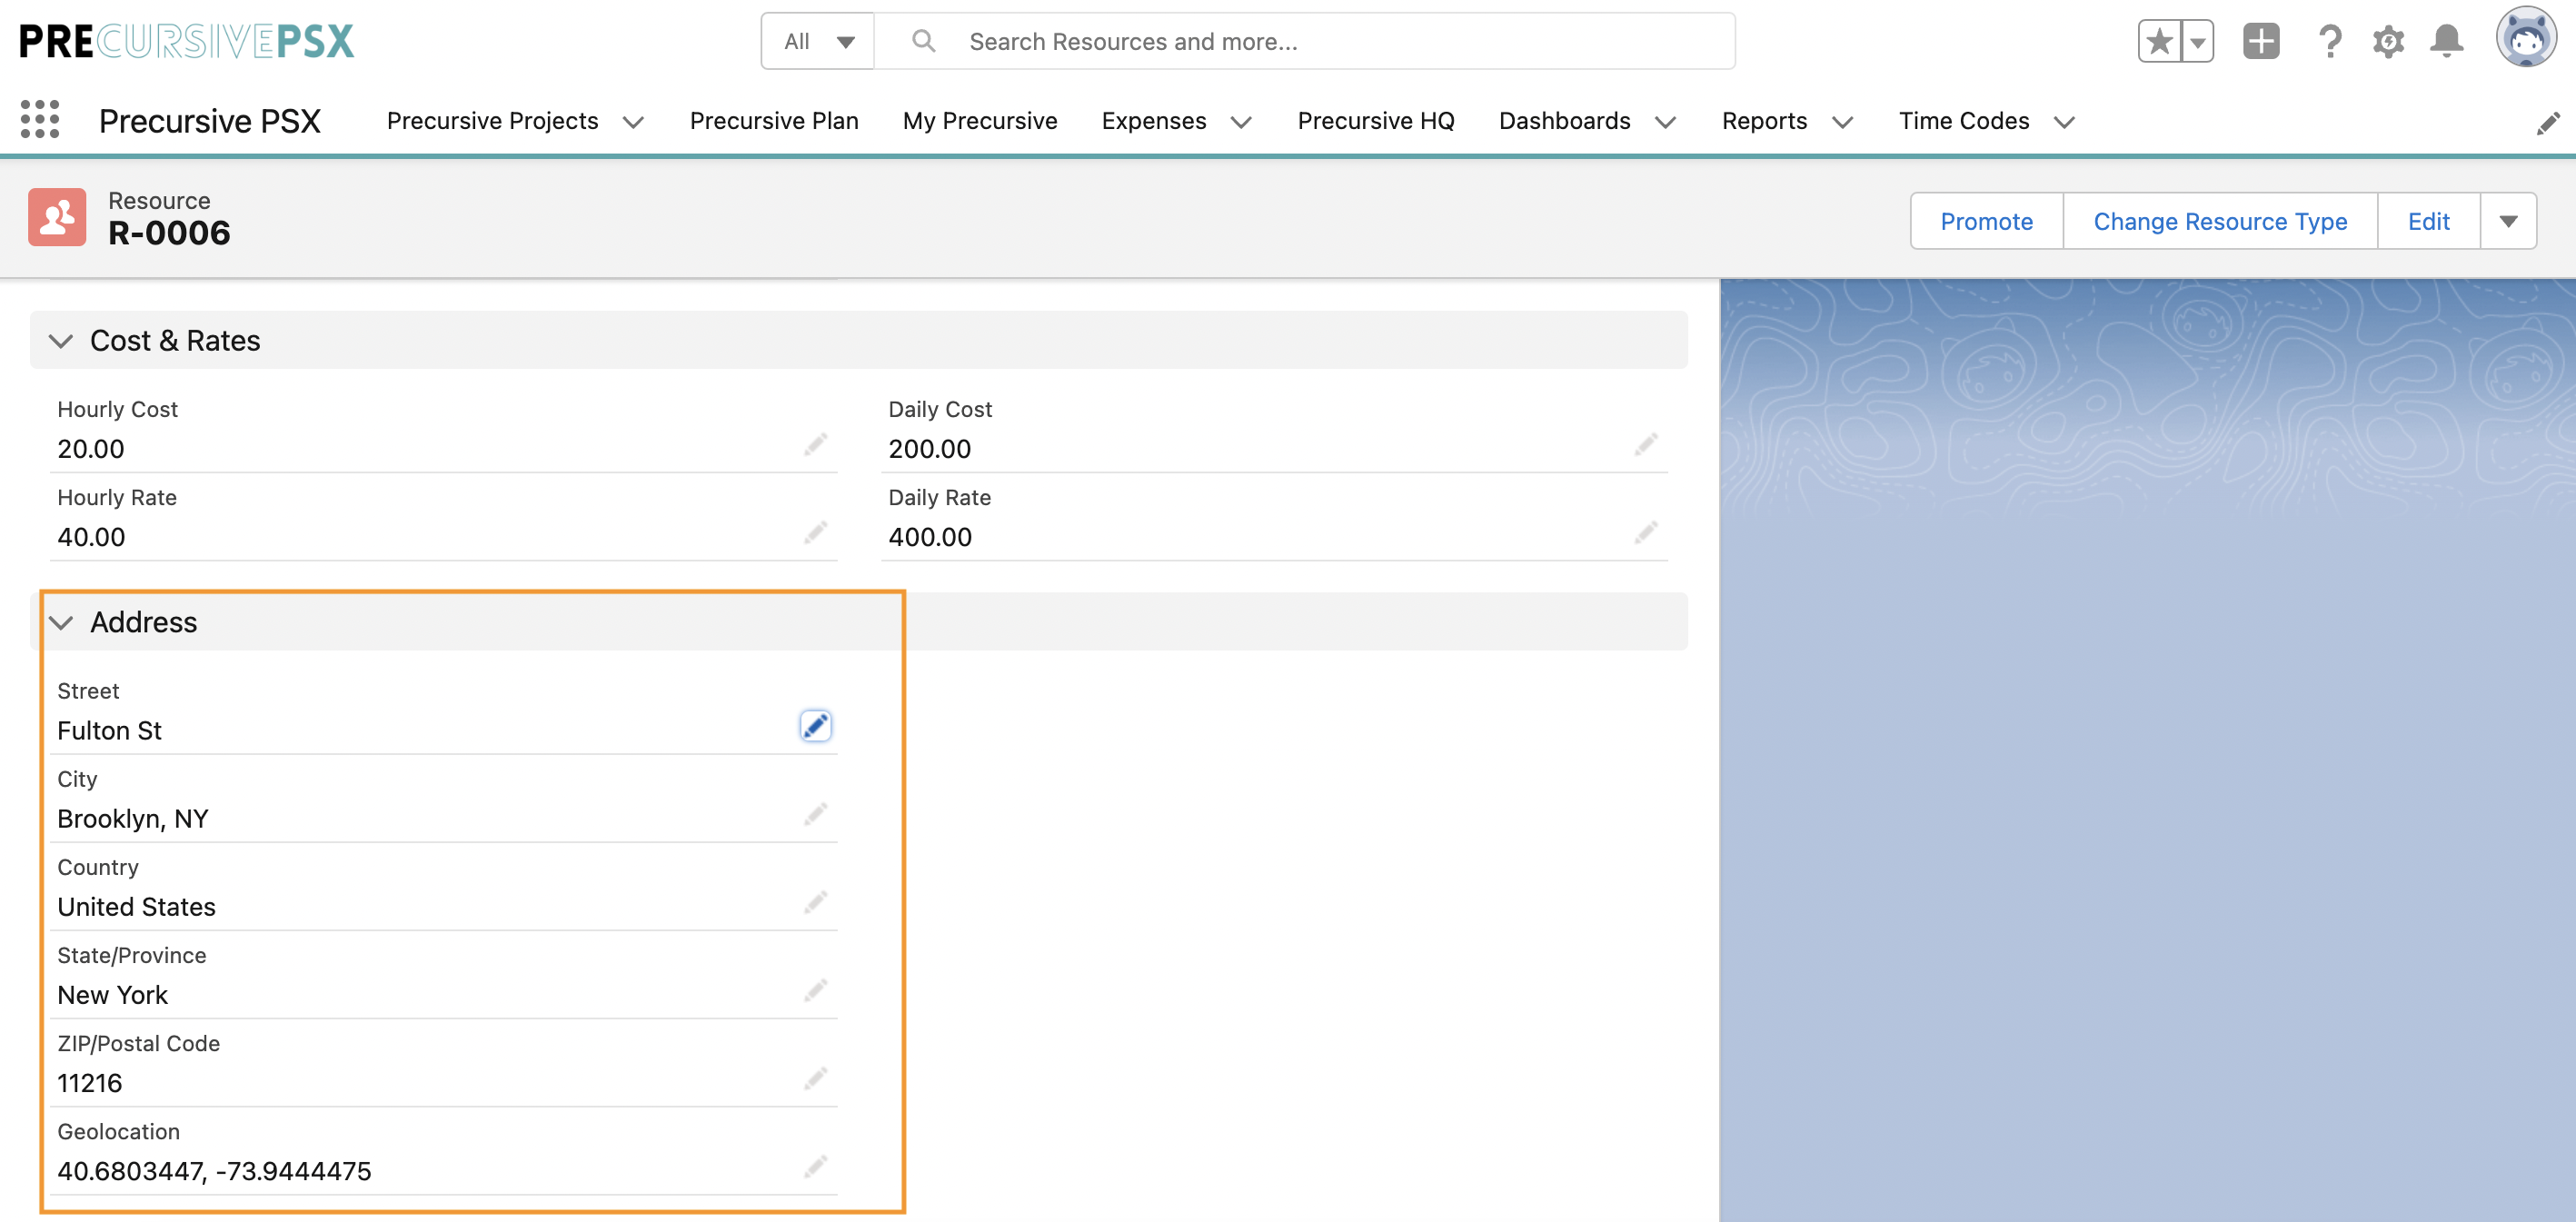
Add an Address section to your Phases and Resources layouts
Go to Setup >> Object Manager >> Phase object. Select Page Layouts. From the top pane, in the Fields section, find the Section tile and drag and drop it below to the layout. Here you can add the Address name, define if you want this section to be one or two columns and add the following fields to the layout:
- Street
- City
- Country
- State/Province
- ZIP/Postal Code
- Geolocation
Navigate back to the Object Manager >> Resource object. Select Page Layouts and repeat the same steps with the Resource Address fields.
Provide Addresses to your Phases and Resources
Fill in the fields that you already added to your layouts as the search will only work in the Assignment Mode for those phases and resources that have an address provided. You can update them manually or do a bulk update of those fields.
How to set up Proximity Search
After configuring Proximity Search (see above), you need to add addresses to your Resources and Project Phases:
- You will need a Salesforce Admin to add a 'Geolocation'-type field to your Project Phases and Resources Page Layouts.
- Navigate to 'Precursive HQ', click 'View All' in the Resources card and fill the 'Address' section in the records of all the relevant Resources records: make sure all the relevant resources records have been updated with a physical address. This will automatically populate the new, custom 'Geolocation' field.
- Add an Address to your Precursive Projects: once a new project is created, make sure and all associated phases are updated with a physical address. Again, this will automatically populate the new, custom 'Geolocation' field on the Phase record.

- Navigate to the Precursive Plan and when Managing Resource Requests , you can now filter resources by Distance!
Related Resources
How to Use Proximity Search