Why Use Phase Stage Path?
-
Provide clarity on Project and Phase progress.
-
Define different Stage values per Phase Record Type to reflect your delivery methodology.
-
Support Salesforce Path and reporting aligned to delivery lifecycles.
-
Track Stage history to understand how long work spends in each step.
How to Configure Phase Stage Path?
Follow the steps below to configure Phase Stage Path in your org:
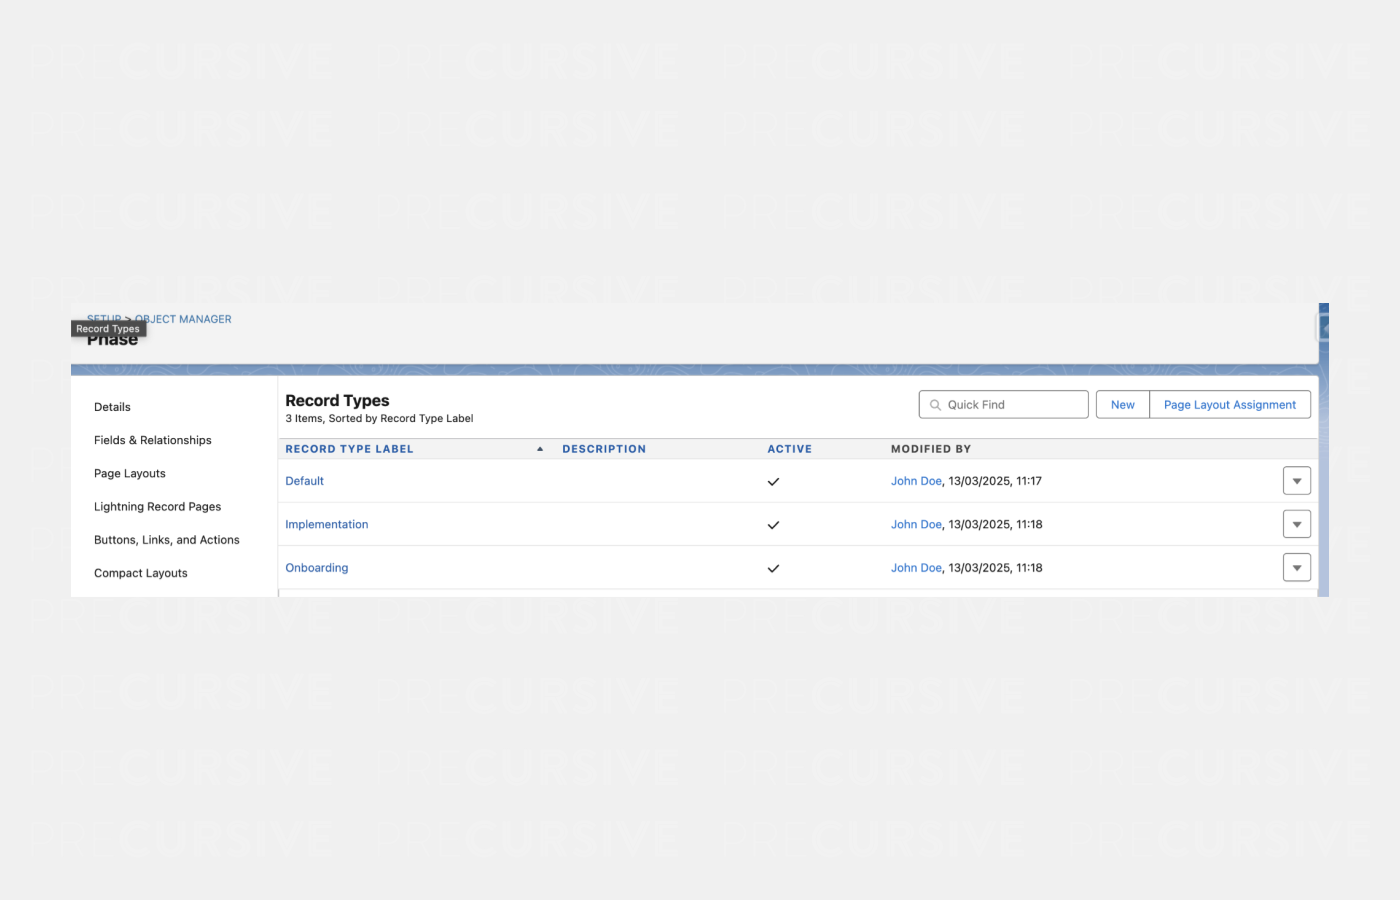
Step 1: Create Phase Record Types
-
Go to Setup > Object Manager > Phase > Record Types.
-
Click New Record Type.
-
Enter a name (e.g., “Implementation” or “Onboarding”).
-
Assign the Record Type to relevant user profiles.
-
Save.
 🔹 Tip: Link each Record Type to a Project Category so that new Phases automatically inherit the correct Record Type. To do this, open the Project Category record and populate the new Phase Record Type field.
Step 2: Define Stage Values per Record Type
-
In Setup, go to Object Manager > Phase > Fields & Relationships.
-
Select the Stage field.
-
Click Set Field-Level Security or Edit Values.
-
For each Record Type, choose which Stage values should be available.
-
Example for Implementation: Backlog, Kick-off, Execution, Go Live, Complete.
-
Example for Onboarding: Planning, Setup, Training, Sign-off.
-
Set a default Stage for each Record Type.
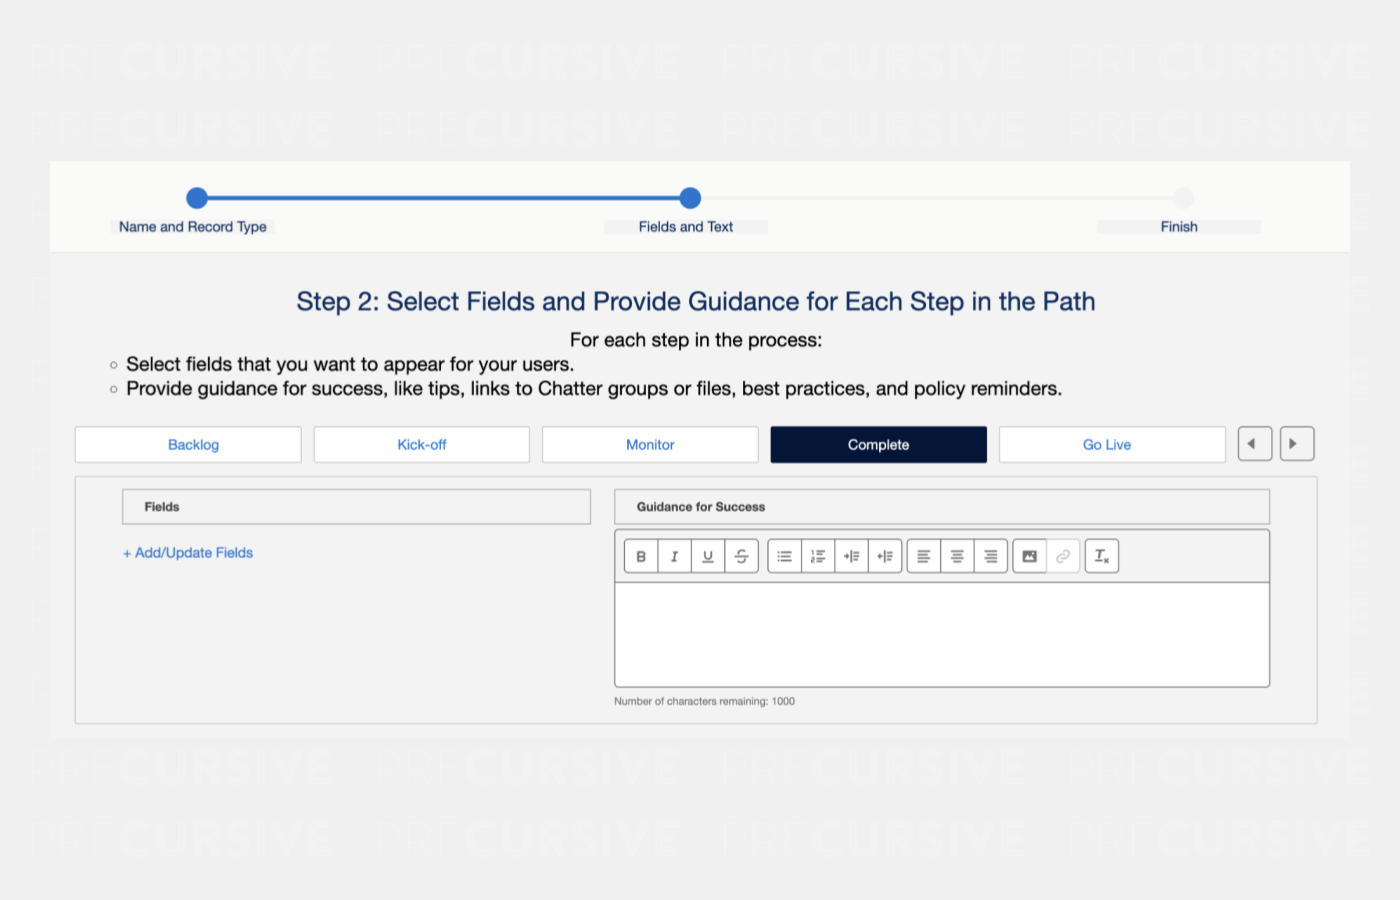
Step 3: Configure Salesforce Path
Paths provide on-screen guidance for users as they move through Stages.
-
Go to Setup > Path Settings.
-
Click New Path.
-
Select:
-
Define Key Fields to display at each Stage (these fields will be prompted to fill in when moving forward).
-
Add Guidance for Success (e.g., “Ensure kick-off call has been completed before moving to Execution”).
-
Activate the Path.
-
Repeat for each Record Type.
Step 4: Update Page Layouts
-
Go to Setup > Object Manager > Phase > Page Layouts.
-
Add the Path component to the Lightning Record Page so users can see Stages visually.
-
Remove the old Phase Stage Path field from layouts (now deprecated).
-
Ensure Phase Record Type is visible on Project Category layouts.
Step 5: Permissions
Users gain access to Stage functionality through their standard Precursive permissions.
How to Use Phase Stage Path?
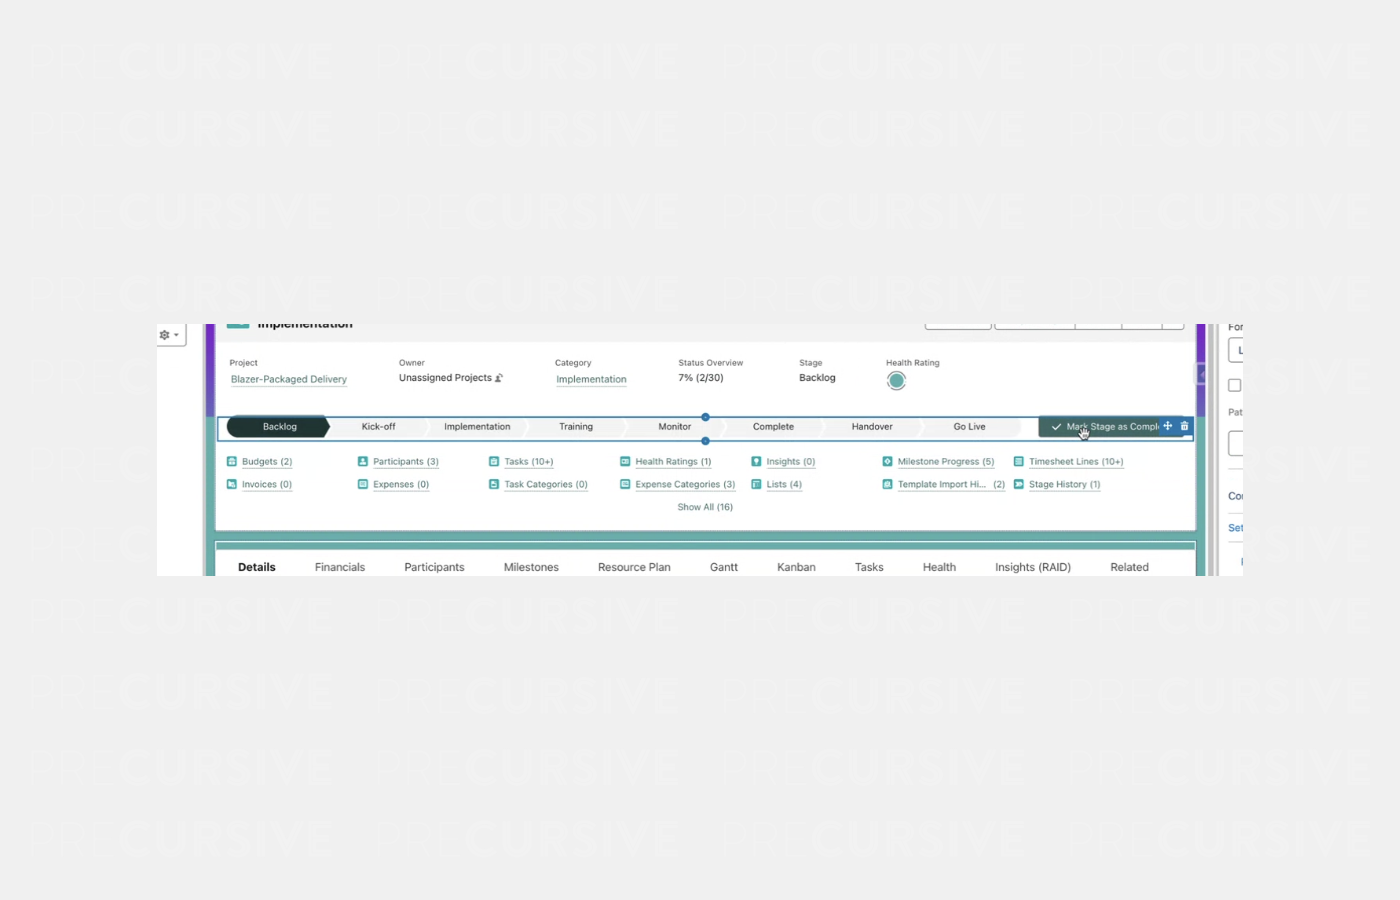
Once configured, Phase Stage Path provides a simple and guided way for teams to work with Phases.
Updating Stages
-
Open a Phase record.
-
Use the Path component at the top to move the Phase to the next Stage.
-
Alternatively, update the Stage directly in list views or Kanban boards.
Automatic Stage Updates from Tasks
-
When a Task linked to a Phase moves forward in its Stage, the Phase will also update if the Task’s Stage is further along than the Phase’s current Stage.
-
If the Task’s Stage is behind, no change will be made (Phases never move backward automatically).
Stage History Tracking
Best Practices
-
Define Stage values that match your delivery methodology. Keep them distinct per Record Type.
-
Always link Project Categories to Record Types to minimize manual setup.
-
Use Salesforce Path to add clear instructions at each Stage — this helps standardize delivery across teams.
-
Review Stage History in reports to identify bottlenecks.
Migrating to Phase Stage Path from Stage Process
Precursive previously supported Stage Process and Stage Process Items objects to manage Phase stages. These have now been replaced with the Salesforce-native Phase Stage Path, which uses Record Types, Paths, and picklist values to simplify setup, reduce maintenance, and improve alignment with Salesforce best practices.
What Has Changed?
-
Stage Process field on Phase → These needs to be removed from layouts.
-
Stage Process Items → Deprecated, no longer used to define stage values.
-
Global picklist “Process Status” → Deprecated, replaced with per-Record Type Stage picklist values.
-
Phase Stage History → Updated to use a new text-based field (preempt_statusValue__c) instead of the old picklist.
What You Need to Do?
-
Update Page Layouts
-
Remove Stage Process fields from Phase and Project Category layouts.
-
Ensure the Phase Record Type field is available on Project Categories.
-
Add the Path component to the Phase Lightning Record Page.
-
Define Record Types
-
Create Record Types for each type of delivery Phase (Implementation, Onboarding, etc.).
-
Assign Stages (picklist values) to each Record Type.
-
Configure Salesforce Path
-
Review Permissions
-
Check Reporting
What Happens Automatically
-
Existing Phase Stages remain intact where possible. If a Phase’s Stage doesn’t exist in the new Record Type, Salesforce defaults apply (the Stage may be blank or reset).
-
Stage progression continues to update automatically based on related Task Stages if the new Stages align.
Custom automations - Important Reminder
If you had custom automations or reports tied to the old Stage Process objects, these must be reviewed and updated to work with the new Salesforce-native Stage configuration.