About
The Holiday functionality allows organizations to set up, manage, and track their employees' holidays, all tailored to their company policies. Once enabled, users can see their holiday allowance and request holiday from My Precursive.
To understand the difference between Holiday and Time Off, see
Set-up Time Off.
Set up
1. Set up a Time Code for Leave
Navigate to Precursive HQ and click View All on the Time Codes tile. Select New and name the time code, e.g.,
Leave. Scroll down to the Leave section and configure according to your Leave policy. For more details, see
Configure Time Codes.
14 STEPS
1. The first step is to open the Project Plan

2. Click on the Due Date of the first Task to edit it.

3. Postpone the Start Date by 2 days. Double click on September 28th and make it the Start & End Date for this Task.

4. Click Save

5. You can see that the Start Date has been updated on the Task Card.

6. Now double-click on the Task Card to Edit Task

7. Scroll down and click on Estimated Hours to edit Booking's Total Hours.

8. Type 6

9. Edit the Remaining Hours to match the estimate and type 6

10. Scroll down and click Save

11. Again, you can see that the remaining time is updated on the Task Card.

12. If you now navigate to the Resource Plan...

13. Click on the Refresh Button to see that the requested Booking for a Project Manager for 4 hours on September 26th...

14. ...It has now been updated to reflect the changes you made to the Task.

Here's an interactive tutorial
** Best experienced in Full Screen (click the icon in the top right corner before you begin) **
https://www.iorad.com/player/2025428/Editing-a-Booking---Resource-Requests-in-Managed-Mode?iframeHash=watchsteps-1
2. Create a Project and Phase
Next, create a Project with a Phase - you can name these both Leave. Users will log their time against this Phase.
❗Set the Phase to Public - this is what allows anyone to log time against it❗
Create a Phase for each type of Leave category you wish to log time against (e.g., Leave, Bereavement, etc.)
3. Configure the Holiday Settings
Set up the default holiday allowance period and number of days in Global Settings, found in the Precursive HQ tab. You can override the number of holiday days for individual resources later. Then define the start and end date to the Holiday Allowance Period.
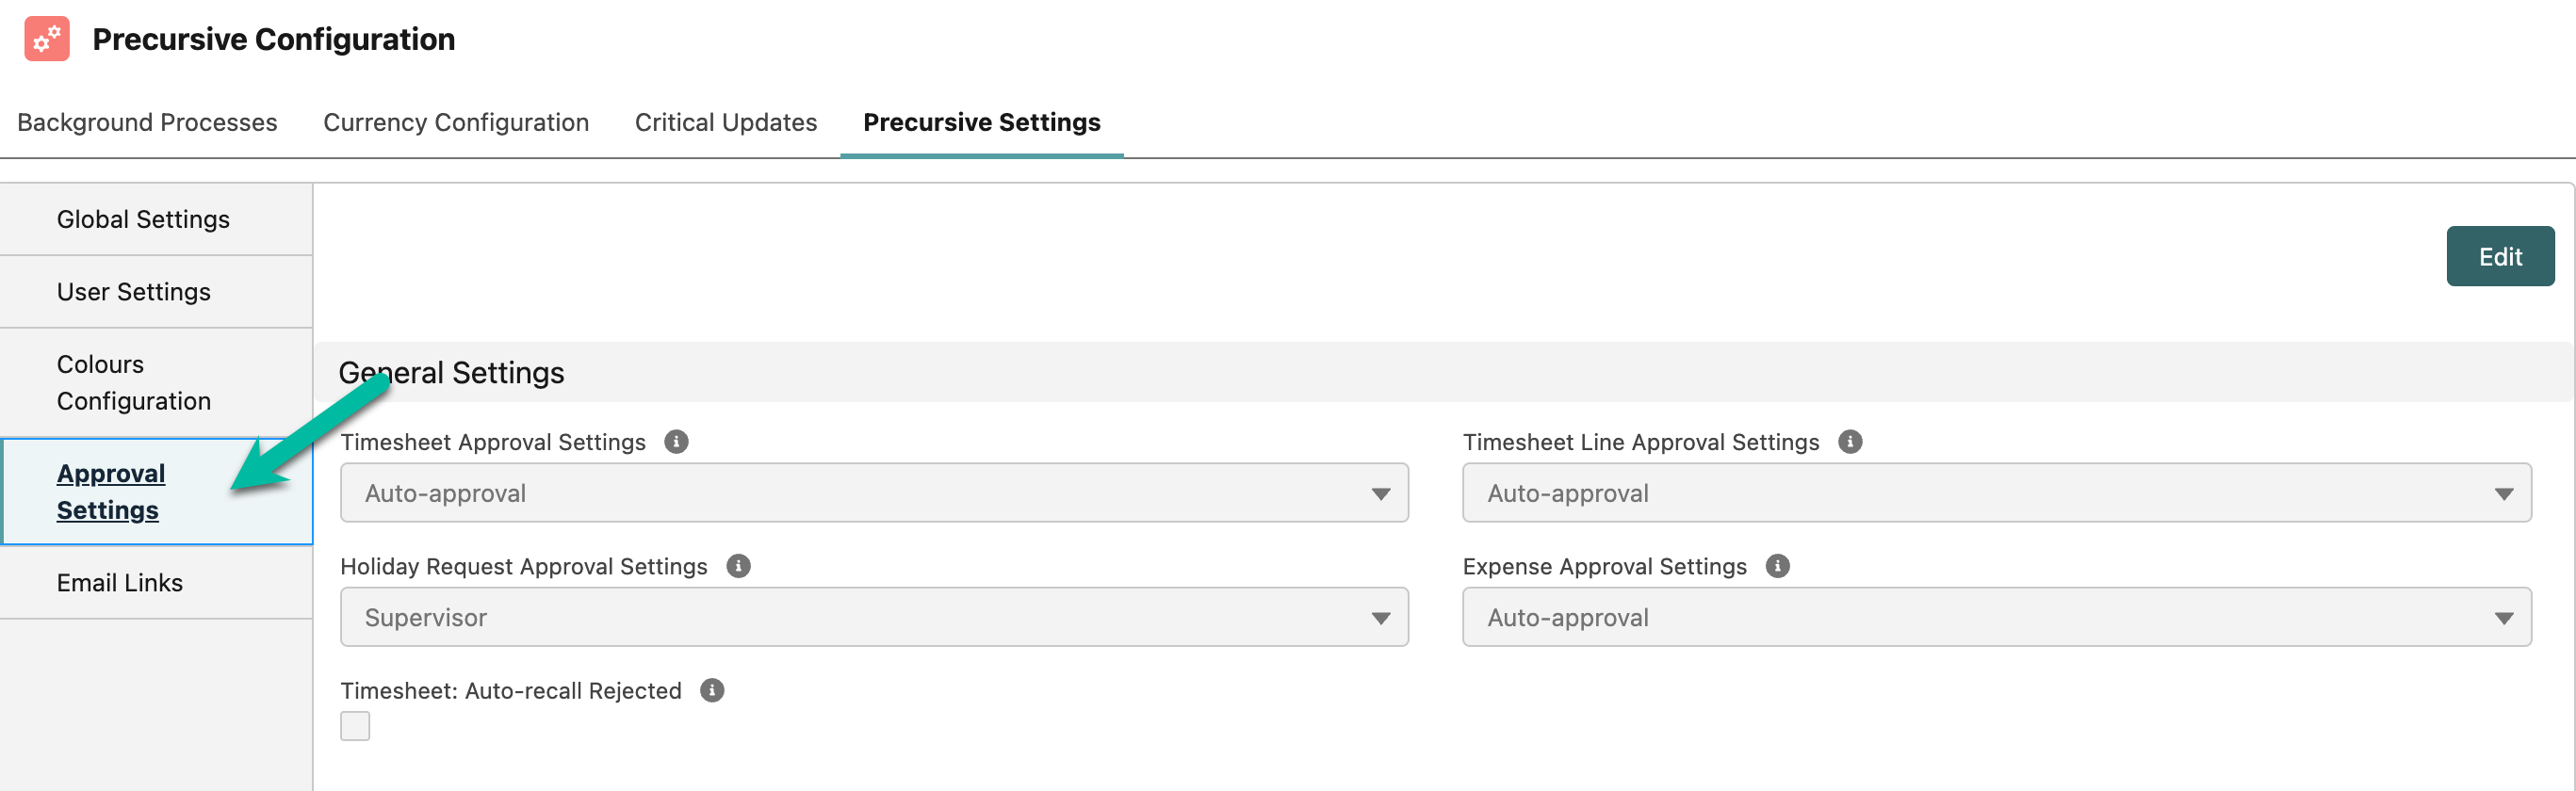
Check the Holiday Request checkbox to enable a separate process which can be configured in Approval Settings. To learn more, see Approvals Configuration.
4. Enable Holiday for individual Resources
In order for Holiday to be visible to your team members (named
Resources) in My Precursive, you need to ensure that Use Holiday Allowance is checked for each
Resource. To find this setting, navigate to Precursive HQ, click View All on the Resources tile, select the Resource by clicking on their blue Resource ID, and finally scroll to the bottom to the Holiday Allowance section.
 ❗
❗It will, by default, award the full annual allowance (configured in step 2: Holiday Settings) to each Resource when checked. Adjust manually for a prorated amount
❗Please see
Approvals Configuration for more information.
Related Resources
Set-up Time OffConfigure Time CodesUtilization Calculations & Reports Approvals Configuration