Supporting recurring periods for Project Budgets automated creation
Highlights
Recurring Project Budgets Automation — Automatically create Project Budgets for recurring services (monthly, quarterly, or annual), reducing manual setup and ensuring Budgets align with how services are sold. See the Project Budgets for details.
What Changed
Products can now be configured with a Budget Period setting (One-Time, Monthly, Quarterly, Annual) that controls how many Budget records are created and their date ranges. When an Opportunity closes (or any other triggering event happens), the system automatically generates the appropriate number of Project Budgets based on the Term Start and Term End dates provided.
How It Works
Budget Period can now be set:
- One-Time: Creates a single Budget for the entire term
- Monthly: Creates a Budget for each month in the term
- Quarterly: Creates a Budget for each quarter (Q1-Q4)
- Annual: Creates a Budget for each year
Once configured, when automation creating Project Budget structure is triggered, the system automatically:
- Applies the Budget Period configuration from each Product
- Creates Project Budgets with appropriate date ranges
- Names Budgets with date markers (e.g., "Managed Services - Q1 2025" or "Support - January 2025")
Example: A 12-month Managed Services contract with Budget Period = Monthly creates 12 separate Project Budgets, one for each month.
Enablement Guidance
Configuration Steps:
- Add the Budget Period field to your Product page layouts
- Update Products with appropriate Budget Period values (for backward compatibility, if nothing is set "One-Time" is assumed)
- Create or update your Flows to use the new Invocable Action 'Create Project Structure From Opportunity With Dates'
- Opportunity ID - the same parameter that was used in previous config
- Term Start Date & Term End Date - the easiest way to configure it is to use fields - existing or new custom ones - from Opportunity
Note: The previous Invocable Method remains unchanged for backward compatibility. Use the new Action for recurring budget functionality.
Magic Assign using Regions and Teams to filter the results
Release Highlights
Magic Assign filters by Resource Role, Team, and Region — Narrow assignment suggestions using organizational and role-based filters to find the right Resources faster while keeping best-fit scoring unchanged. See the Magic Assign for more details.
What Changed
Magic Assign has received a significant upgrade to how Resources and Tasks are filtered and displayed. New right side pane is added with new filters:
- Resources: Filter Resources from multiple roles (still having Participant Role to filter Tasks to which these Resources can be assigned)
- Teams: Filter Resources by Team membership
- Regions: Filter Resources by geographic Region
- Skills: Filter by specific Skills (existing functionality, moved to filter pane)
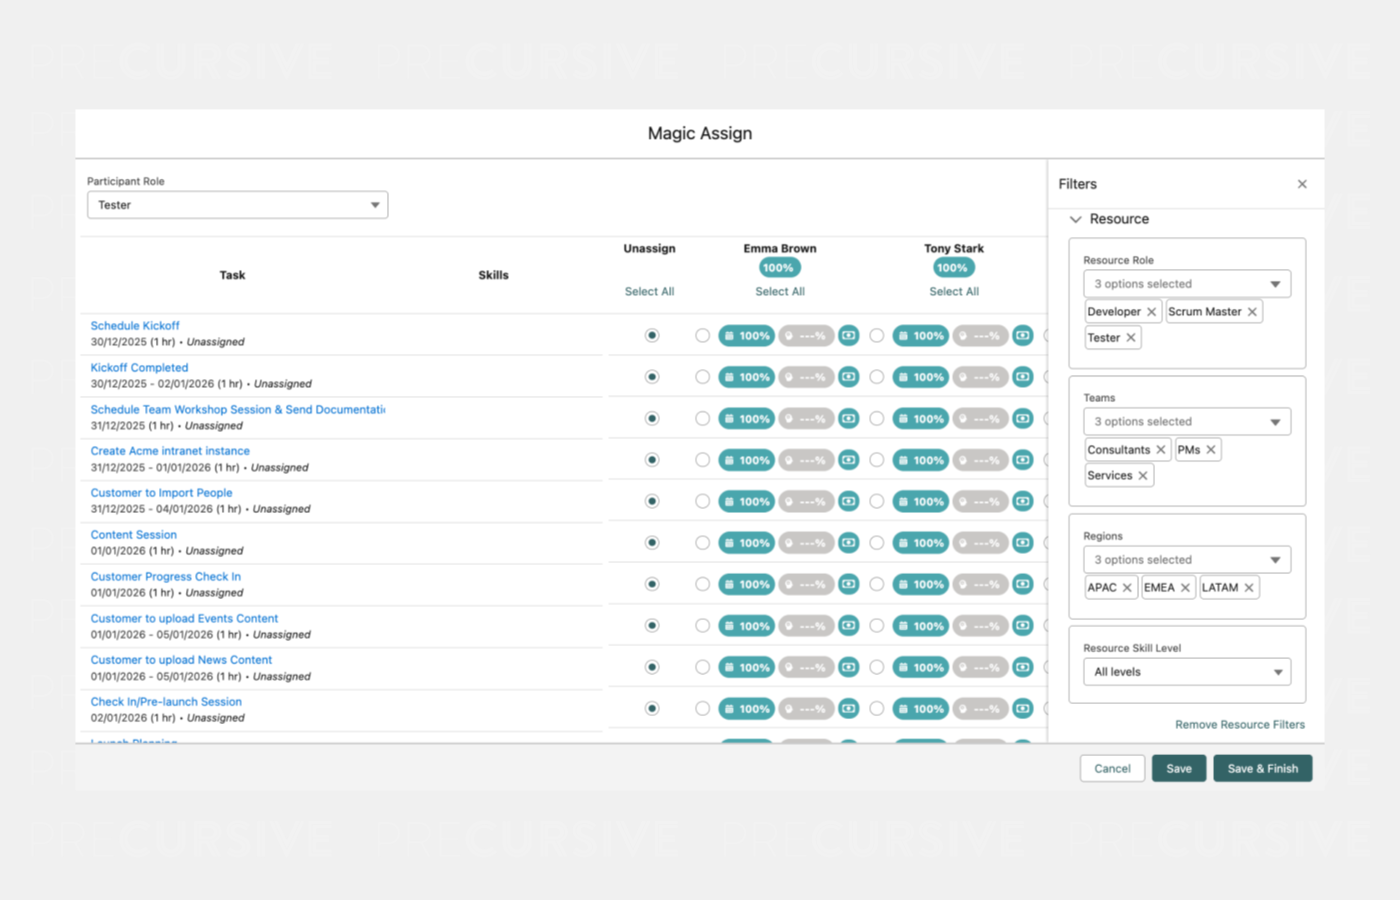
How It Works
- Open Magic Assign:
- if Phase has Region/Team set, these are pre-populated in filters
- Participant Role dropdown (left top corner):
- Select the Participant Role to filter which Tasks are shown for assignment
- This also sets the initial Resource Role filter value
- Click the filter icon to open the Filter Pane (right side)
- Resource Role Filter
- Initially shows only the role matching your Participant Role selection
- Click to EXPAND and add more Roles to see a wider pool of Resources
- "No Role" option shows Resources without an assigned Role
- Teams and Regions Filters
- Multi-select to filter by Team/Region assigned Resources
- Selected values display as labels below the filter
- Skills Filter:
- Works as before - filter by specific Skill Level
- Filter indicator: Red dot on filter icon when filters differ from defaults
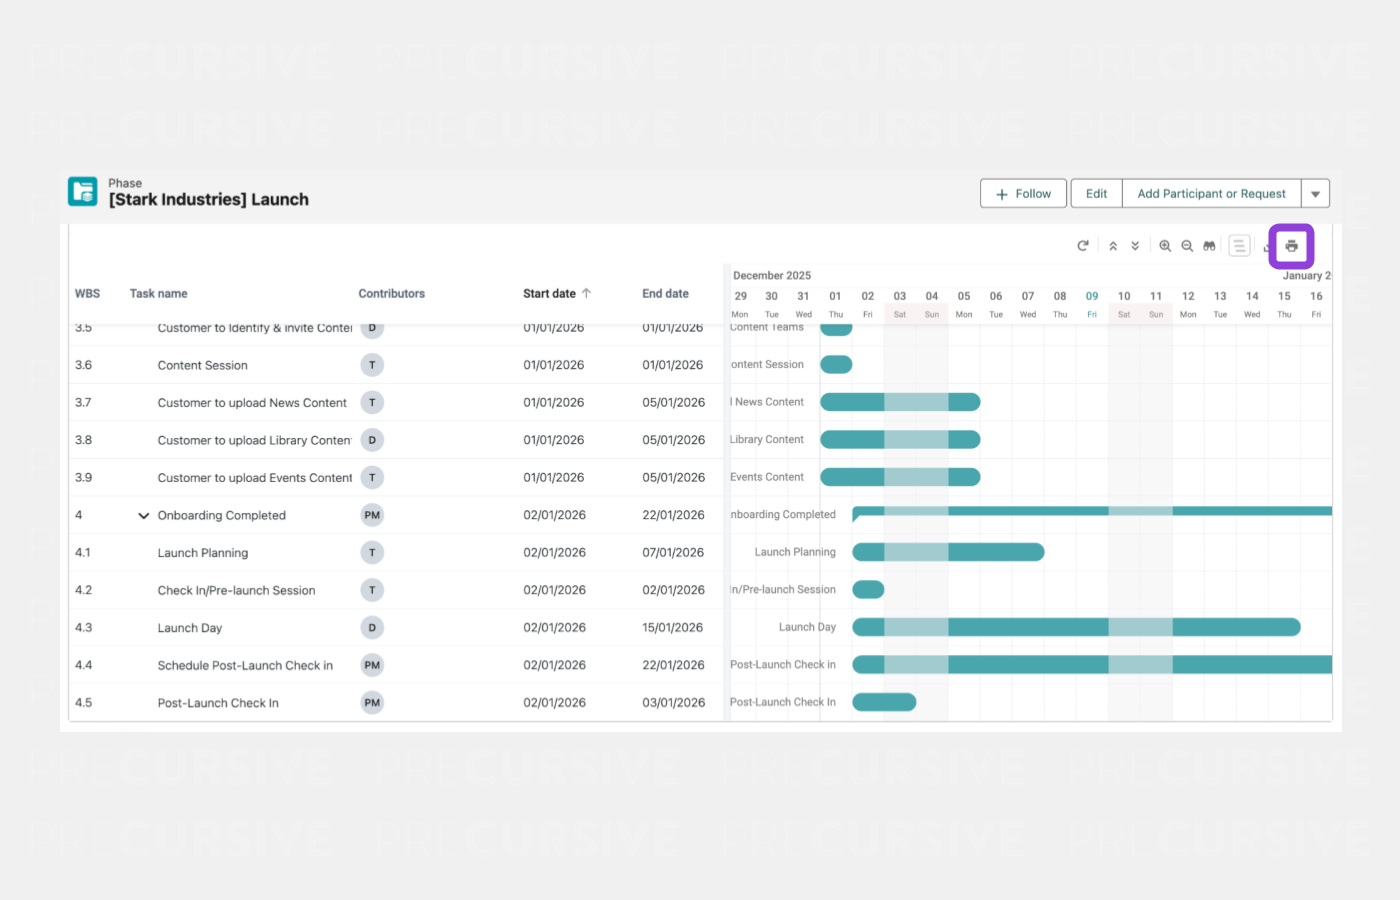
Enable "Print" feature on Gantt
Release Highlights
Gantt Print Support — Print or export Gantt plans directly from Precursive to share timelines, dependencies, and schedules with stakeholders more easily. See the Managing Tasks Across Different Views (Kanban, Gantt & Task Planner) for details.
What Changed
A new Print capability has been added to the Gantt view, allowing users to generate printable or exportable versions of project timelines for sharing with stakeholders.
How It Works
Users can trigger a print action directly from the Gantt view.
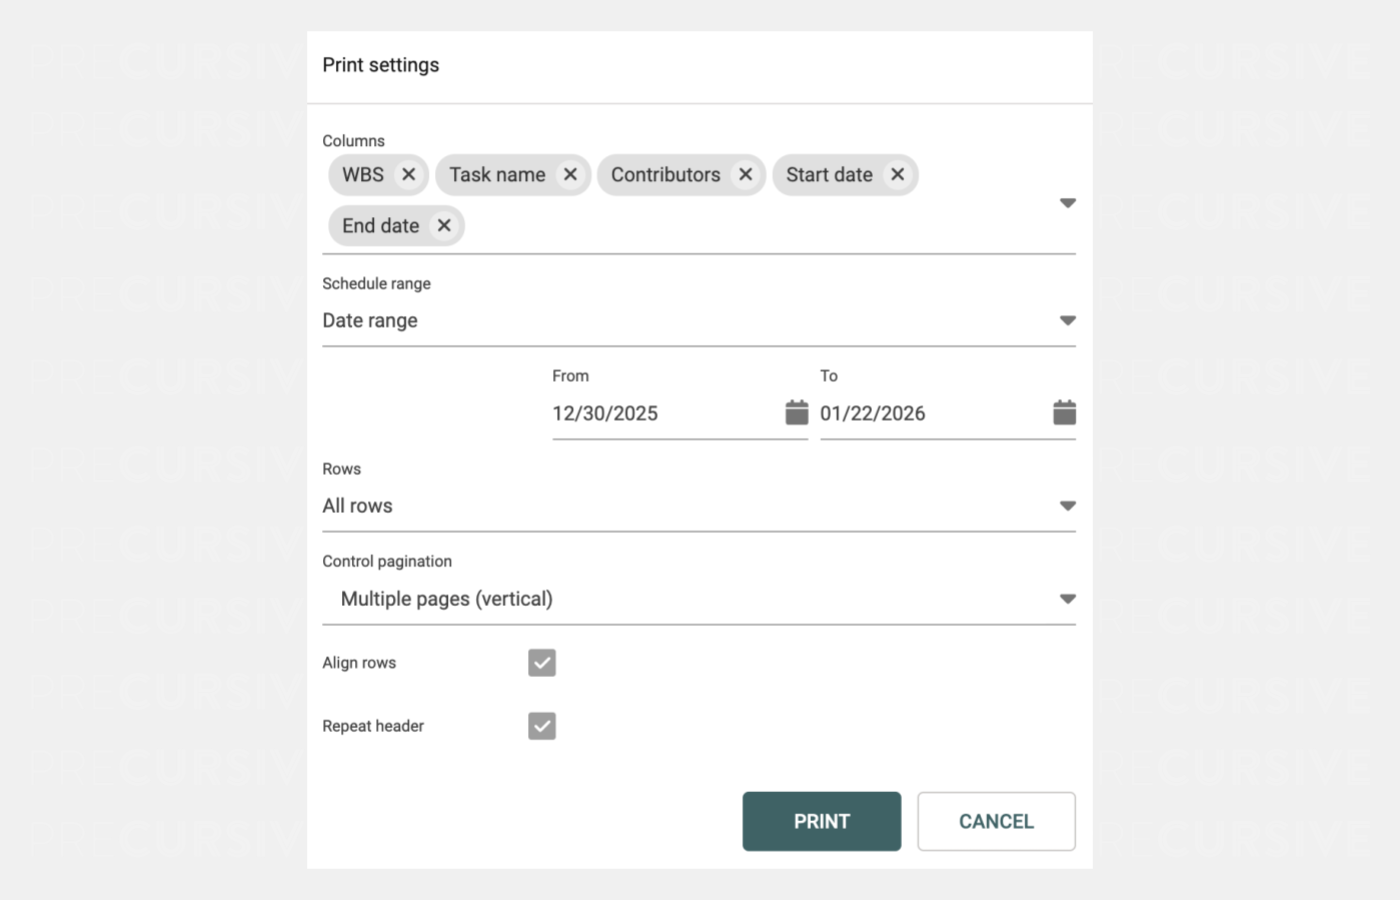
The output is configurable and can be modified:
- Columns: Select which columns to include in the printout
- Schedule range: Choose complete schedule or custom range
- Rows: Select all rows or specific rows
- Control pagination: Single page or multiple pages (vertical)
- Align rows: Option to align rows across pages
- Repeat header: Include headers on each page
- Paper format: A4, Letter, etc.
- Orientation: Portrait or Landscape
Enablement Guidance
Lightning Web Security (LWS) must be enabled in Salesforce for the Print feature to function correctly. LWS is a Salesforce-level setting and may have wider implications beyond Precursive. Review Salesforce documentation related to LWS to understand functional and compatibility implications.
Data Model Changes
Version 2.16 introduces new field to support the capabilities described above.
NEW
|
Object Label
|
Field Label
|
Field API Name
|
Field Type
|
Description
|
|
Product
|
Budget Period
|
preempt__budgetPeriod__c
|
Picklist
|
Controls how many Budget records are created for a Product and the date range for each Budget, based on the service term. This setting is used with the Start and End Dates passed into the Project creation process.
|
Review all Release Notes.